It’s Orange-Colored Food Season

Did you know that Traditional Chinese Medicine (TCM) advocates eating orange-colored food this time of year?

Without getting too deep into it, TCM interprets foods that are orange in color to be warming and as the weather gets colder, eating warming foods helps keep the body in balance.

My first thoughts when I think of orange food are memories from many years ago when I worked for a theater company (in administration). On the first day of rehearsal for every new show, there would be a mixer so that all of the administrative and production staff could meet the new cast. It was the tradition to serve what was affectionately called “orange food” — an extravaganza of all manner of orange junk food: Cheetos, goldfish crackers, Reese’s Pieces, you name it, with a tray of carrot sticks thrown in for good measure.

Although I am a big fan of Cheetos, I am pretty sure that it isn’t the kind of orange-colored foods that TCM is promoting. But if you think about it, TCM’s orange-colored food season does coincide with Trader Joe’s everything pumpkin season. Coincidence? Maybe not.

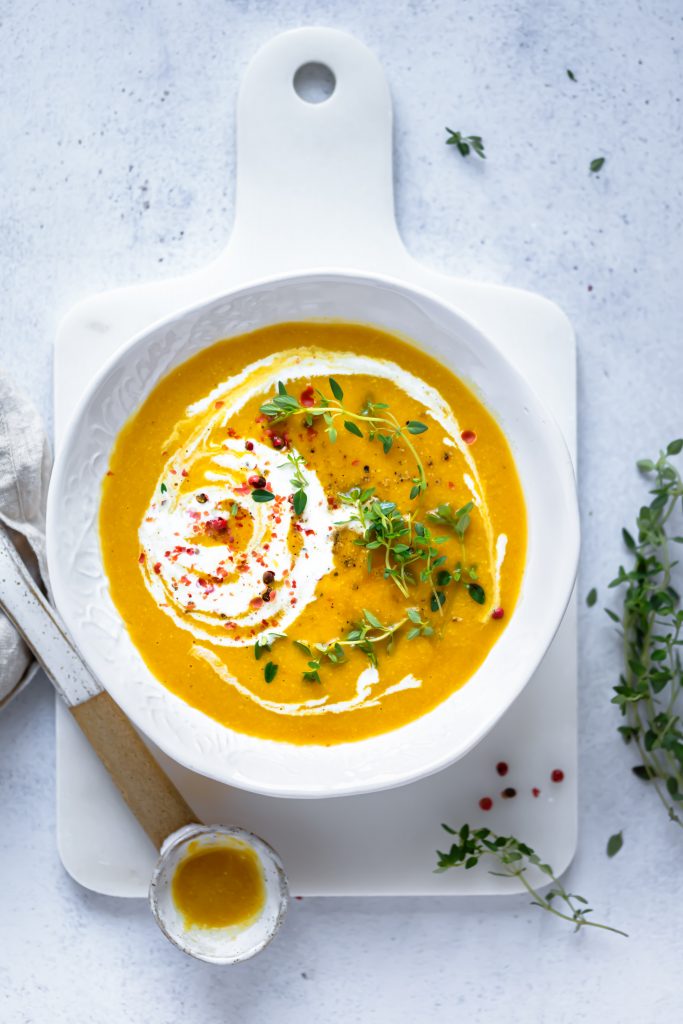
A few weeks ago, I was visiting a friend and she made a butternut squash soup. It was extra special because this friend does not like to cook. The gesture was not only thoughtful, but the soup was delicious. Last week, I was having a hankering for some orange-colored food (tis the season), and was remembering what a fun time we had together, so I decided to see if I could recreate the soup she made.

It was time to dust off the trusty slow cooker and try to whip up my own batch from memory. It didn’t quite turn out the way that I remembered (a hazard of not using a recipe or measuring) but it was still delicious (and easy).

Butternut Squash Carrot Ginger Soup

Ingredients

  • One onion, chopped
  • Three or four carrots, chopped
  • One butternut squash, peeled and chopped
  • Garlic (2 cloves or more)
  • Some ginger (I used two of the frozen cubes of ginger from Trader Joes – next time I will use more)
  • Some turmeric (at least a tablespoon)
  • Broth (I used chicken broth)
  • Can of coconut milk (I used light because that is what they had when I went to Trader Joes, also, I don’t know if I was supposed to use the whole can, but what was I going to do with the rest of it?)
  • Salt to taste

Process

  • Sauté the onion, carrots, and squash just to get it going a bit (~5 minutes)
  • Add the garlic, ginger, and turmeric, continue to sauté until it starts smelling like something is happening
  • Dump the container of broth, stir, cover,
  • Switch the cooker to slow and low and go about your day (you could always InstaPot for faster results)
  • Come back later (I let mine cook for 6 hours) and blitz it with the stick blender
  • Dump the coconut milk in, give it a good stir, see if it needs salt and you’re set (I let it go another hour with the coconut milk in because I wasn’t ready to have dinner yet)

Serving suggestions

  • A dollop of sour cream or crème fraiche
  • A sprinkle of scallions
  • A handful of pomegranate seeds
  • Croutons (or a grilled-cheese sandwich on the side)

I like this version much better than the butternut squash soup that I made last year. The next time I make it, I am going to be sure to use a lot more garlic, ginger, and turmeric – I think I would like it a bit jazzier.

Have you been eating more orange-colored food recently (other than Cheetos of course)? Got any great recipes to share?

All of the Pesto, None of the Basil

Something new that I’m doing in 2021 is getting farm box delivery. I have really enjoyed the pandemic practice of minimizing trips to the grocery store, but running out of fresh vegetables is the pits. It’s been great having a box full of veggies show up at my door ever couple of weeks.

I’m a big fan of vegetables in the crunchy water family (I believe that’s the technical term) – celery, cucumbers, etc. and one of my favorite things to get in my farm box delivery is radishes.

One week, I noticed that the greens on the radishes were looking particularly lovely. Were they edible? Yes! What could I make with them? Pesto!

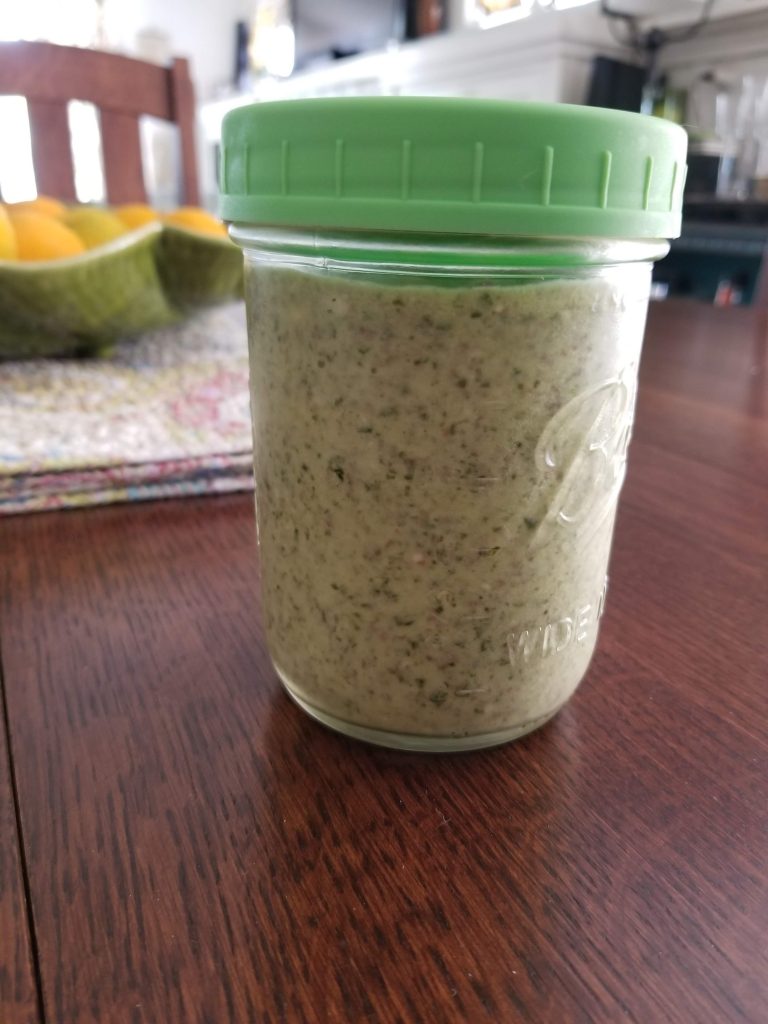
Since this was an experiment with bonus vegetables (radish greens are now on my list with beet greens as a vegetable gift-with-purchase), I didn’t worry about not having all the right ingredients to make pesto (such as basil or pine nuts). I just threw the radish greens in the blender with some other things I had on hand to see what would happen.

It turned out good enough to share the recipe with you here.

Radish Greens Pesto

Suggested Ingredients:

  • Bunch of radish greens (cleaned)
  • Handful or two of walnuts (I don’t keep pine nuts on hand, but I always have walnuts around)
  • Couple cloves of garlic
  • Lots of lemon juice
  • Plenty of olive oil
  • Some salt

Blitz the radishes, garlic, and lemon juice in the food processor until the greens are mostly broken down.

Throw the walnuts in and keep blitzing until it resembles a lumpy paste (so that you can’t tell that they are walnuts anymore and the whole thing has taken on a pretty, light green color).

Now comes the fun part, let the food processor run and drizzle in olive oil until the concoction sort-of smooths out (I feel like Ina Garten when I do this which is why I think it’s so much fun).

I like it on the thick side but add as much olive oil as you like (at least enough to get to a creamy-ish texture).

If you taste it at this point, it will taste very bitter and you will be sad, but don’t despair! Just add salt! A good bit of salt, not just a wee sprinkle.

Now taste it. Magic? Yes. Salt magic. It will be a little more bitter and earthy than a basil/pine nut pesto, but still plenty tangy/zesty.

Now that you have your pesto, what are you going to do with it?

You could put in on pasta, sure. You could use it as a spread or a dip. You could use it to dress a green salad. I use it for a roasted vegetable salad that I have been experimenting with and it is perfect for bringing all the random ingredients I found in my cupboard together.

Lentil and Roasted Veg Salad

  • Cook ½ cup (or so) lentils (use the kind that stay firm) w/ salt and thyme in water until just done, drain and cool. *or substitute a can of garbanzo beans for the lentils – even easier!
  • Dice one sweep potato, toss with olive oil, salt and pepper and roast until tender.
  • Optional (but delicious): dice some turnips and roast with the sweet potato.

Let everything cool a bit, throw it in a bowl, cover, and throw it in the fridge.

Later add:

  • A good amount of chopped parsley
  • Some artichoke hearts
  • Some sliced radishes
  • Maybe a scallion
  • Maybe some grated parmesan
  • Whatever else is in the fridge/the cupboard/the garden that looks interesting
  • Lots of your delicious homemade pesto

Get it all mixed together and it’s ready to eat. Or you can throw it back in the fridge for later.

Both the pesto and the roasted vegetable salad feel like good foundations for improvising as the seasons change and different produce is available. What would you add/change?

Soup Season, Part 2

Welcome to Part 2 of the Soup Season Diaries. Did you make any soup in the past week? Just in case you are looking for more inspiration, here are a couple more soups that we’ve made recently.

Butternut Squash Soup

The produce box decided to bring me a butternut squash the other week. I was delighted and intimidated and decided that the best way to put it to use was something that wouldn’t rely on my knife skills to succeed. It was another perfect victim for soup season.

  • Step one: dispatch the squash. I cut off the ends, cut it in half across the middle and used the potato peeler to peel it. Then I split each section, removed the seeds, and roughly chopped the whole thing into reasonable-sized bits.
  • Next, dice an onion, sauté in olive oil, sprinkle with salt.
  • Once the onion starts to get soft, add two cloves of garlic. When the garlic starts to get aromatic, add a good splash (maybe more of a pour) of white wine. Let that reduce a bit.
  • At this point switch to your slow cooker (or slow cooker mode if you have an all-in-one).
  • Add the chopped/peeled butternut squash and four cups of liquid. Go do something else for a few hours.
  • For a while it will smell like you are making chicken soup (if you use chicken stock). Don’t panic, just ignore it until you begin to smell the squash. Then go check it and if the squash is tender it’s time to blitz it with the immersion blender (or transfer to the blender).
  • Once you have a fairly smooth puree, check your seasoning. We decided that we needed to add a good blast of Cayenne pepper, some black pepper, and more salt.

My serving suggestion for this is to add a nice dollop of sour cream and a generous sprinkle of chopped parsley/scallions.

photo by Monica Grabkowska on Unsplash
Split Pea Soup

This is Mr. Man’s specialty. He bought a five-pound bag of split peas off of the internet almost as soon as we got the fancy slow cooker. The only reason that he doesn’t make split pea soup all the time is that we don’t tend to have smoked ham hock sitting around all the time.

There really aren’t steps for this one. Mr. Man doesn’t bother with sautéing the onion, celery, and carrots, he just throws them right in the pot with the split peas, ham hock, and liquid. He does chop the onions and celery rather fine; they seem to disappear into the split peas, leaving just big chunks of carrots and hopefully little bits of smoked ham.

He recommends starting the slow cooker on high until everything gets going, the split peas start to soften and you smell the smoky ham hock. Then switch to low and let it go a while longer.

Before serving, he will pull out the ham hock and use a fork to pull the meat off the bone. If it doesn’t look particularly delicious, skip this step and just throw it out. You can always dice some breakfast ham or even sandwich ham if you want.

Soup season is a fun time to make something delicious with whatever you happen to have on hand. I hope I have inspired you to undertake a bit of careless cookery.

Soup Season, Part 1

Well winter has finally found her way to southern California. I don’t know why cold weather seems to be a particularly good reason to make soup, but Mr. Man and I have been souping up a storm around these parts. I suppose it is finally soup season.

Our favorite way to make soup is in the slow cooker. We have a fancy one with a sear setting that I use to sauté the onions and whatever other aromatics before switching to low and slow. I love using the slow cooker because I can throw everything together and then go off to do other things. Another great thing about making soup in the slow cooker is that there are plenty of opportunities to make adjustments if things aren’t turning out the way you want them to (a little Cayenne pepper can fix a lot). Here are some soups that we’ve made recently. *

*these aren’t actually proper recipes with measurements and specific ingredients; they are more like suggestions of things that you can throw in a pot.

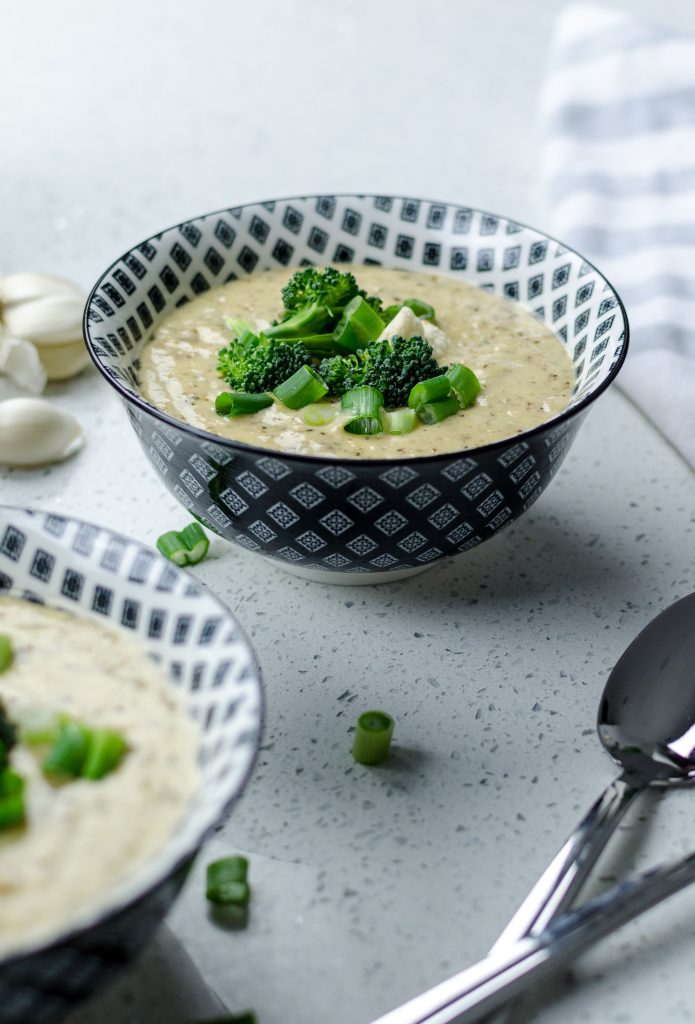
Cream of Broccoli soup

Soup season started because my farm box delivery came with a big bunch of broccoli. I decided that a nice cream of broccoli soup would be a great way to use the stalks as well as the florets. It also allows a lot of leeway for you to decide where you want to fall on the healthy to indulgent continuum.

Here is how I’ve been making broccoli soup:

  • Dice one onion.
  • Roughly chop the broccoli stalks and remove the florets.
  • Sauté the onion and broccoli stalks in a good amount of butter until softened. Add a bit of salt and maybe a splash of white wine.
  • In a slow cooker combine sauteed vegetables with liquid (I like to use one carton of low-sodium chicken stock, but you can use four cups of water, some combination of any kind of broth/stock and water … whatever works for you), and the broccoli florets. Let it all cook for a while.
  • When everything is soft and starting to smell good, carefully go to work with your immersion blender. Or transfer to your blender and then back to the slow cooker. You should wind up with a creamy-ish puree. At this point, you have a fairly healthy soup but if you want to kick up the creaminess, you can add:
    • A cup of whole milk or cream (this is enough to give the soup a rich taste/texture).
    • OR … a bit of cream cheese,
    • OR … more butter,
    • OR … shredded cheese,
    • … you get the gist.

photo by Samee Anderson on Unsplash.
Thai Coconut Curry Chicken Soup

We had a package of boneless chicken thighs in the freezer that were just waiting for their moment of greatness as the centerpiece of a slow cooker meal and I finally decided to fake something up. Here is my completely made-up version of Thai Coconut Curry Chicken soup:

  • Seasoned the chicken thighs with salt, pepper, garlic powder, and ginger (I just used dried, powdered ginger).
  • Seared them (in the slow cooker or a pan) for about 5 minutes on each side. Put them on a plate to rest.
  • In whatever you used to sear the chicken: add some olive oil and sauté one onion and about an equal amount of chopped celery and carrots. Sauté for 5-10 minutes. Once it gets going it should pick up all the crusted-on chicken bits.
  • In your slow cooker, combine the softened veggies, the chicken, one jar of Trader Joes Thai Red Curry Sauce, and up to four cups of liquid. Let that cook for a while. Maybe add a chopped sweet potato (I love sweet with spicy, don’t you?). Eventually it should start smelling mostly like chicken soup with a bit of a kick. The longer you let it go, the more the flavors meld.
  • At some point, you are going to want to pull out the chicken and either chop or shred it.
  • When you get close to serving time (maybe an hour before, maybe less) add one can of coconut milk. This completely changes the complexion of the soup in a wonderful way.
  • If the liquid seems thin, don’t hesitate to add a bit of cornstarch dissolved in warm water, you want that thick, stew-style broth.

Serving suggestion: serve over rice.

The only problem with all the soup-making we’ve been doing this soup season is that I haven’t managed to make up a loaf of crusty bread to go with any of it! Thankfully, there is still time. I’ll share a couple more soup recipes next week. Do you have a favorite soup that you like to make? Do you use a slow cooker or the stovetop?

Rosemary-Lemon Bread

Among my various around the house activities these past few months, I couldn’t help to succumb to the siren call of trying to make homemade bread. It was a big deal; there were many (mostly imaginary) obstacles for me to overcome to attempt such a culinary adventure: my fear that it would be complicated, my disinterest in kneading, my lack of proper bread pans, and the absence of yeast in my pantry. Over zoom happy hour a while back, my friend mentioned that she had found a really easy recipe for rosemary-lemon bread that you make in a cast iron Dutch oven. I’m not sure what all she said after that, I only heard certain words which continue to ring in my mind: rosemary, lemon, crusty, soft inside.

I wiped away the drool and demanded that she send over the recipe immediately!

Now, what about the yeast? Mr. Man was planning on making a trip to the market, so I let him know that he had better come home with yeast because I needed to make this rosemary-lemon bread as soon as possible. I’m not saying that he didn’t wind up going to multiple stores on his quest, but he did return home triumphant.

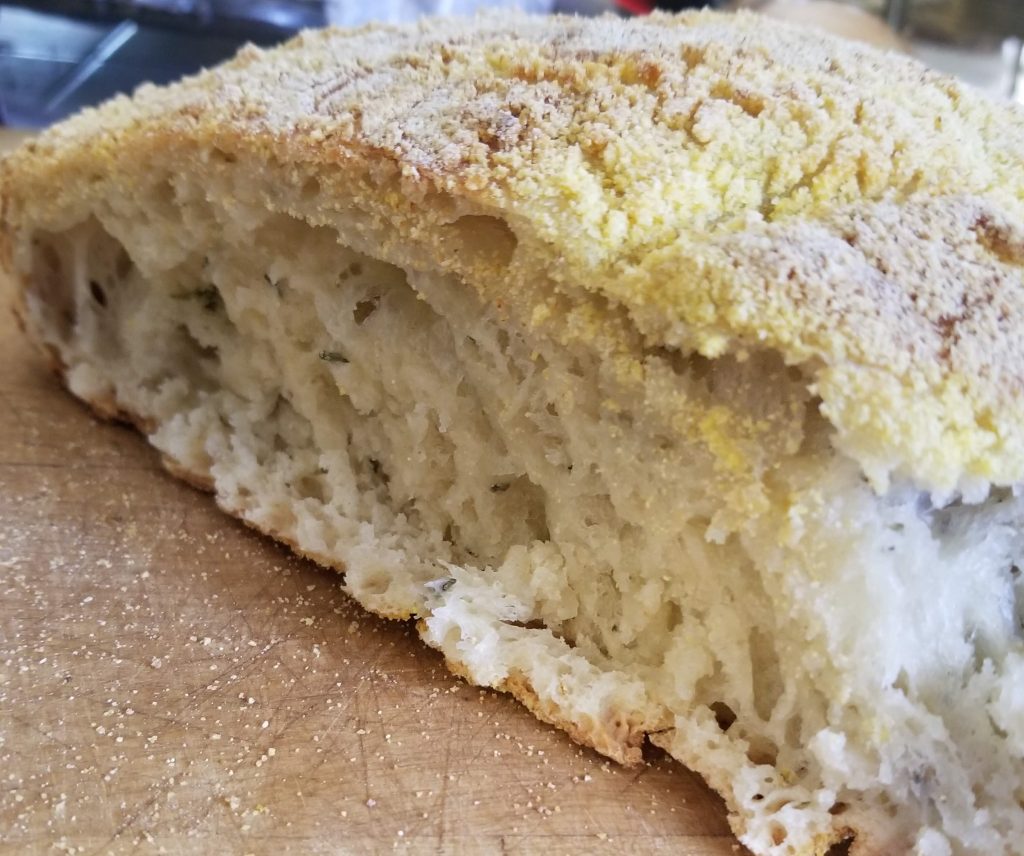
Our first attempt was a moderate success. I think the dough wound up really sticky and that it didn’t achieve its full potential in terms of how much it rose. But it was tasty, and more importantly, the smell was incredible. It merited another attempt for that reason alone.

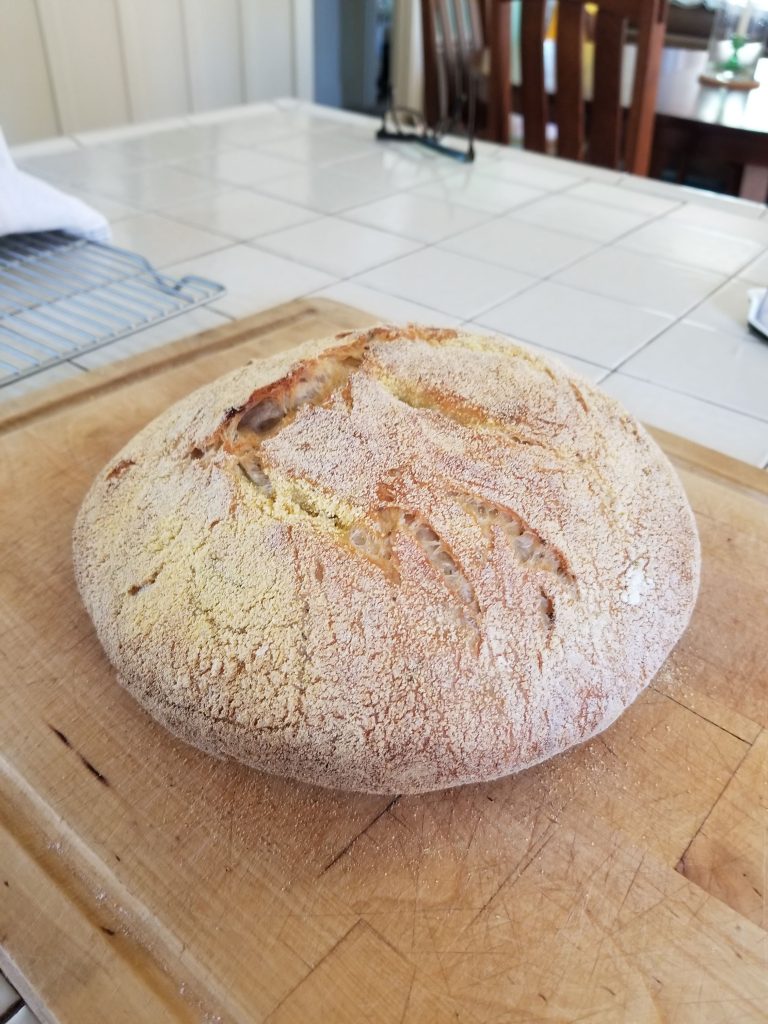
This past weekend I tried again. I was able to correct the two issues from my previous attempt and it came out even better than the first time around. I’m so excited to have made bread!

*If you are not already a bread maker, before you attempt this recipe, be warned: I feel that this is a gateway recipe that could create a lot of enthusiasm for and interest in making more/other kinds of bread (at least that is what has happened to me).

Williams-Sonoma Rosemary-Lemon No-Knead Bread

Ingredients:

  • 3 cups all-purpose flour
  • 1/4 tsp. instant yeast
  • 1 3/4 tsp. salt
  • 2 tsp. chopped fresh rosemary
  • 2 tsp. lemon zest
  • 1 5/8 cups water
  • Cornmeal as needed

Directions:

  • Combine flour, yeast, salt, rosemary, and lemon zest in a large bowl.
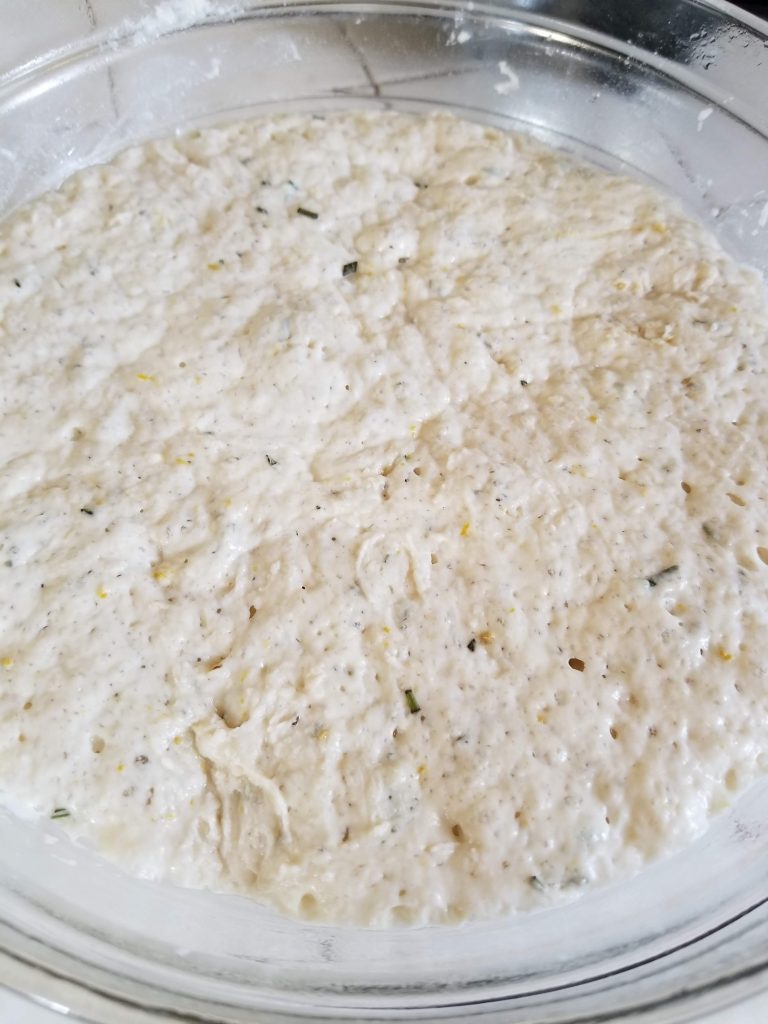
  • Add water, stir until blended (it will look like a mess, it’s ok).
  • Cover with plastic wrap and rest in a warm (70-ish) place for 12-18 hours (I tucked mine into the oven with just the oven light on overnight).
  • After 12-18 hours your dough should have grown quite a bit and it should be bubbly/lumpy looking.
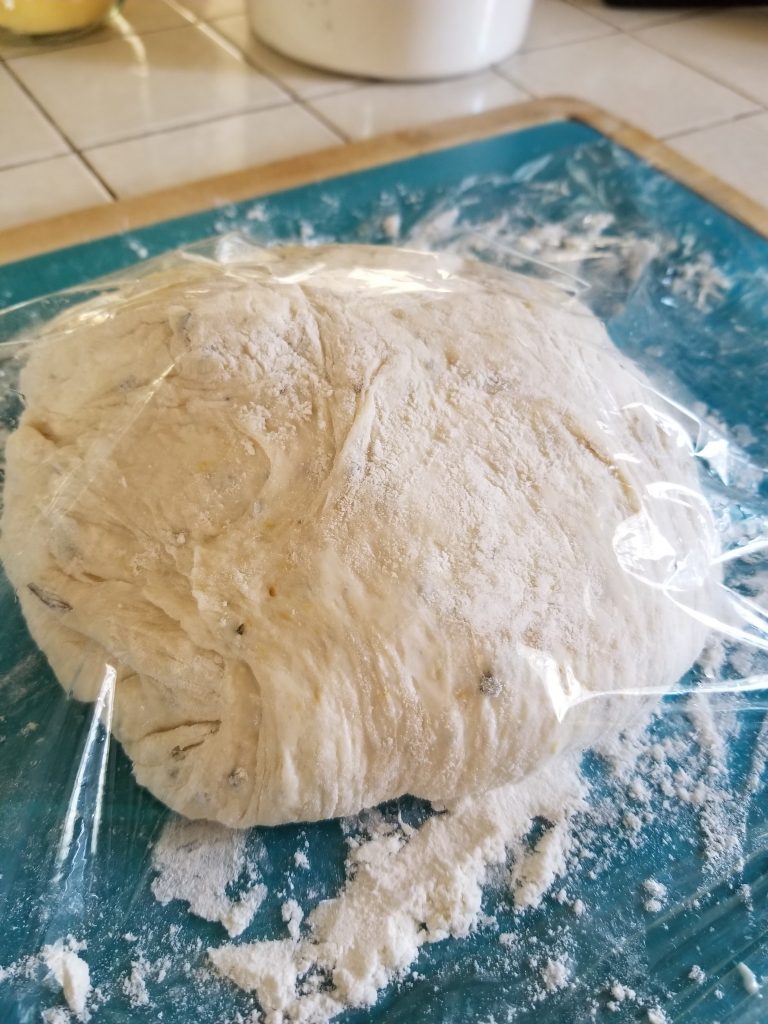
  • Dump the dough out onto a lightly floured work surface. Sprinkle with a little flour and fold it over itself a few times (it should be easy, when it stops wanting to fold, it’s ready to rest). Cover loosely with plastic wrap and let it rest for 15 minutes.
  • Get a tea towel ready with a light coating of cornmeal. Using just enough flour to keep it from sticking, form the dough into a ball. Place it on the cornmeal towel, seam side down. Dust with more flour and cornmeal and cover with another tea towel. (My dough ball quickly turns itself into a dough blob. It’s the thought that counts, right?)
  • Let rest for 2 hours (dough should double in size and should not spring back when poked).
  • At the 1.5-hour mark of your dough ball rest, put your Dutch oven (including lid) in your oven and preheat to 450. You want your pot to preheat for at least 30 minutes.
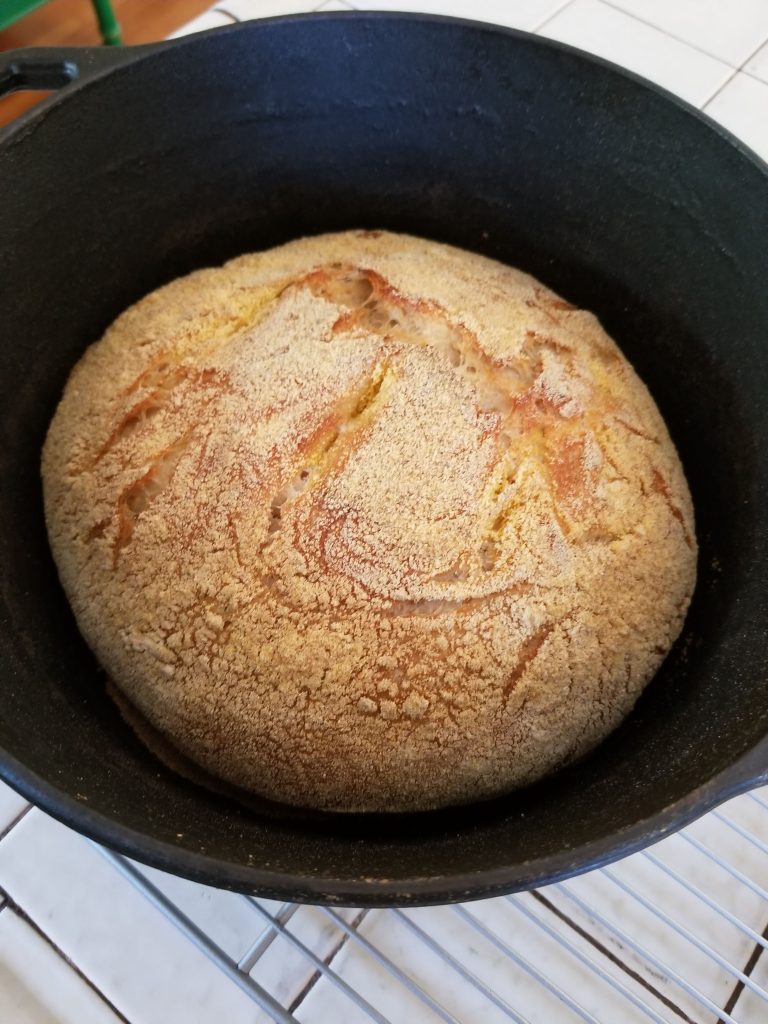
  • Remove the pot from the oven. Uncover the dough and use the bottom towel to pick it up. Carefully dump it in the pot (I got cornmeal EVERYWHERE, just sayin’). You can shake the pot a little if it looks too wonky. You also can use a knife to cut some slits in the top of the dough (it feels like a very professional-baker kind-of thing to do). Put the lid on and bake for 30 minutes. Uncover and continue to bake for 15-30 minutes (until the top is golden brown).
  • Remove from the oven and let it cool in the pot for 10 minutes before turning it out (I like to dump it out on a clean tea towel, otherwise I get cornmeal everywhere all over again).

I recommend having softened butter handy and digging in while it’s still warm.  If you want to keep yourself from eating the whole thing, cut it in half right away and run some over to your neighbor.

Rose Petals by Any Other Name

Recently, I have had an overwhelming urge to make the most of the natural resources around me. Anything growing in my yard (or my neighbor’s yard) has been fair game. Among the many, various, ridiculous things that I have been up to, one of my favorites involves rose petals from the wild, old-fashioned rose bush in my backyard.

This rose bush has those wonderful, fragrant blooms that open all the way up and immediately fall apart. So as much as I would like to bring them inside and put them in a vase, they are terrible roses for cutting because as soon as a bloom opens, it begins to disintegrate.

It turns out that there are more uses for roses than just looking at. Since I’m a fan of the Trader Joes rosewater facial mist, I wondered if that was something that I might be able to make myself. And so, I began down a rabbit-hole of things to make with rose petals. Rose petals are anti-inflammatory and high in antioxidants. That is why they are such a popular ingredient in fancy skincare things. The lovely smell is a plus.

*If you are going to make anything with rose petals, make sure that they haven’t been treated with pesticides.

First, I decided to make rose water. It sounded like a nice thing to do. Rose water can be used directly on the skin or hair and can be ingested. There are two methods for making rose water: extraction and distillation.

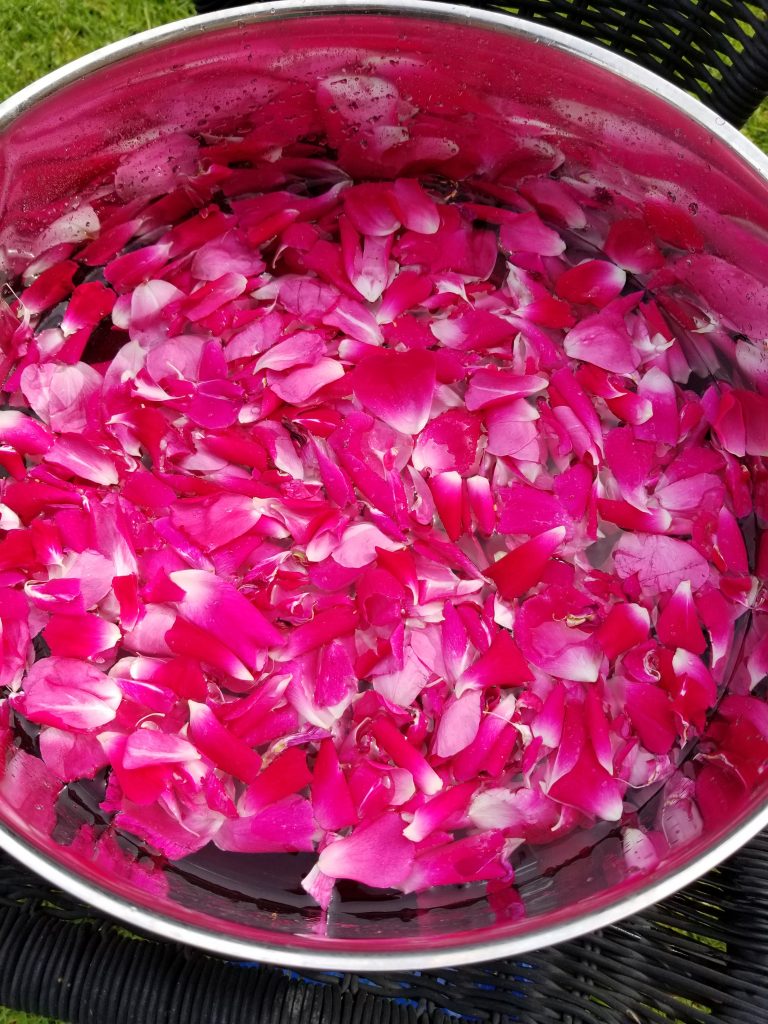
Extraction involved putting rose petals and water in a pot and simmering gently.  When the rose petals lose their color, your extraction is complete. Strain out the petals and store the finished rose water in the refrigerator. Mine comes out a sort of dark pink/brown color.

The distillation method sounded like it would involve all sorts of equipment and knowledge, but I was delighted to learn can be undertaken at home as well. I felt so science-y! For this technique, put a heat-proof bowl in the center of a pot, then surround it with rose petals and water (I used roughly equal parts fresh rose petals and water). Place the lid on upside down and place ice packs on top. This encourages the condensation to collect in the bowl in the center of the pot. Again, a low simmer is best and once the petals have lost their color, you’re done.

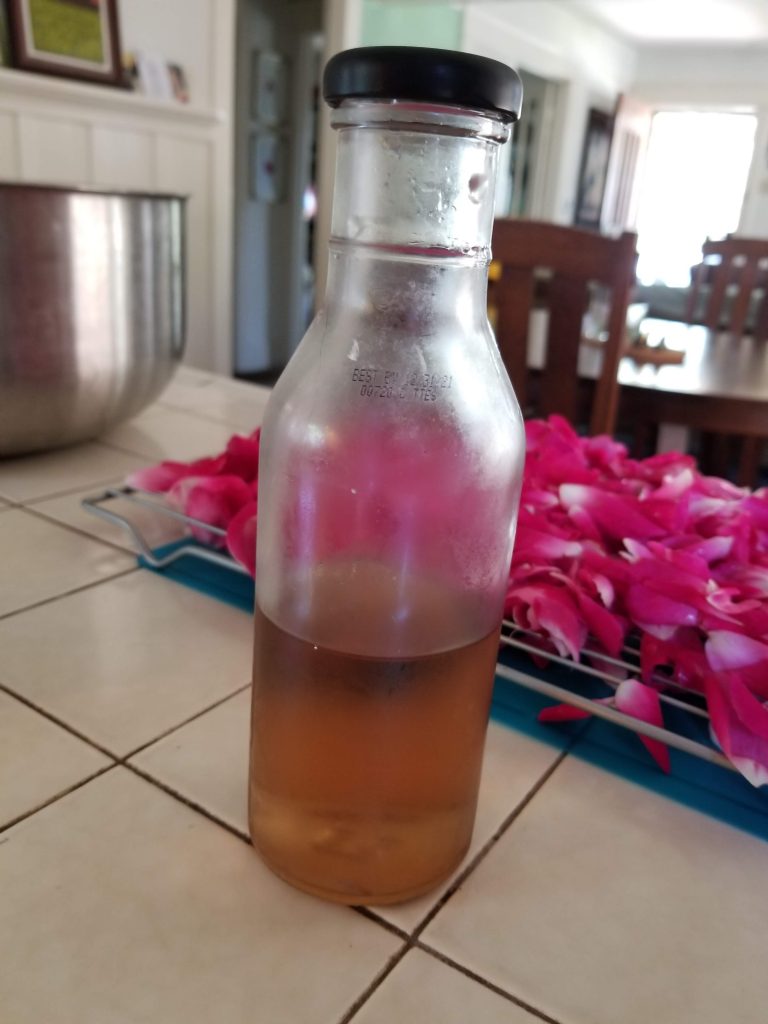
Here’s the thing about distillation: it yields much less rose water although it is clear and said to be of higher quality.

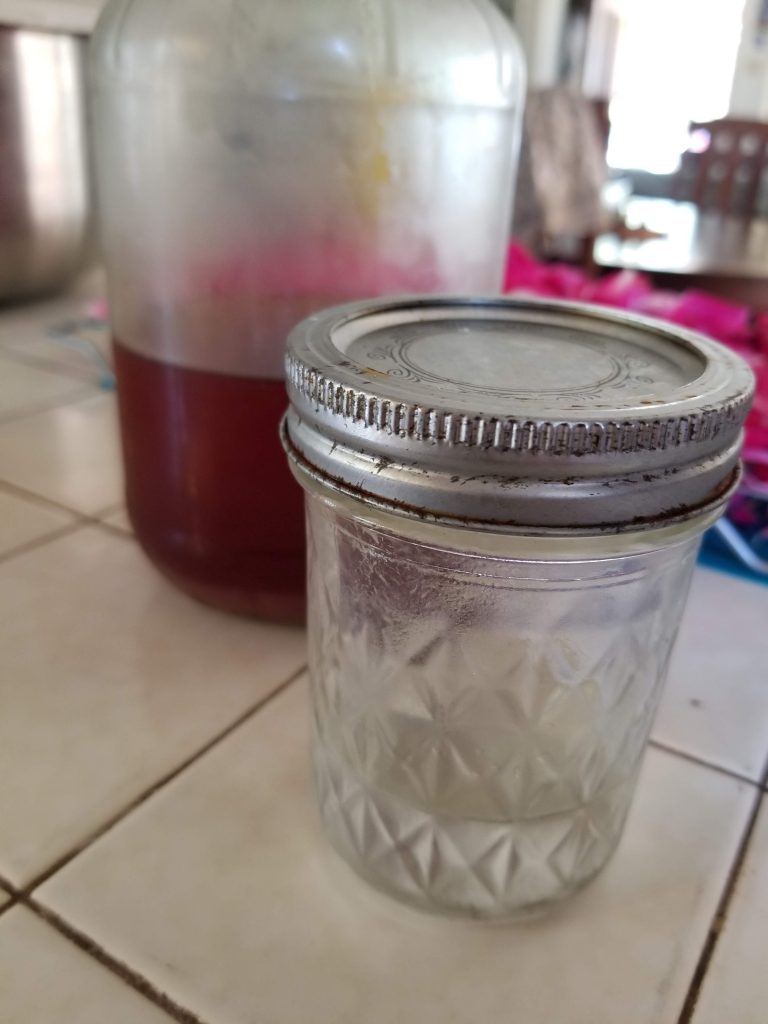
What I consider a bonus is that you still wind up with a good amount of extracted rose water in the pot, so you might as well save that too.

full yield of distilled rosewater in front, half-empty jar of extracted rose water behind

I’ve been using my rose water as a toner and my skin loves it, especially if I’ve gotten a bit too much sun.

Next, I took rose water one step further and made rose syrup. I followed the extraction method then immediately added sugar to the warm, strained rose water (one-part sugar to two-parts rosewater worked for me) and stirred until it was dissolved.

This produced a delicious smelling if still unattractive brown-ish result. But when used for a cocktail it creates a delightfully pink drink.

Rose-y Gin Drink (help me come up with a better name please!)

  • 2-parts gin
  • 1-part fresh lime juice
  • 1-part rose syrup
  • Shake with ice
  • Serve up

Rose syrup is a common ingredient in Persian desserts (rose ice cream for one, which I do intend to attempt soon). There are probably also fun ways to use it in baking which I probably won’t get around to for a while.

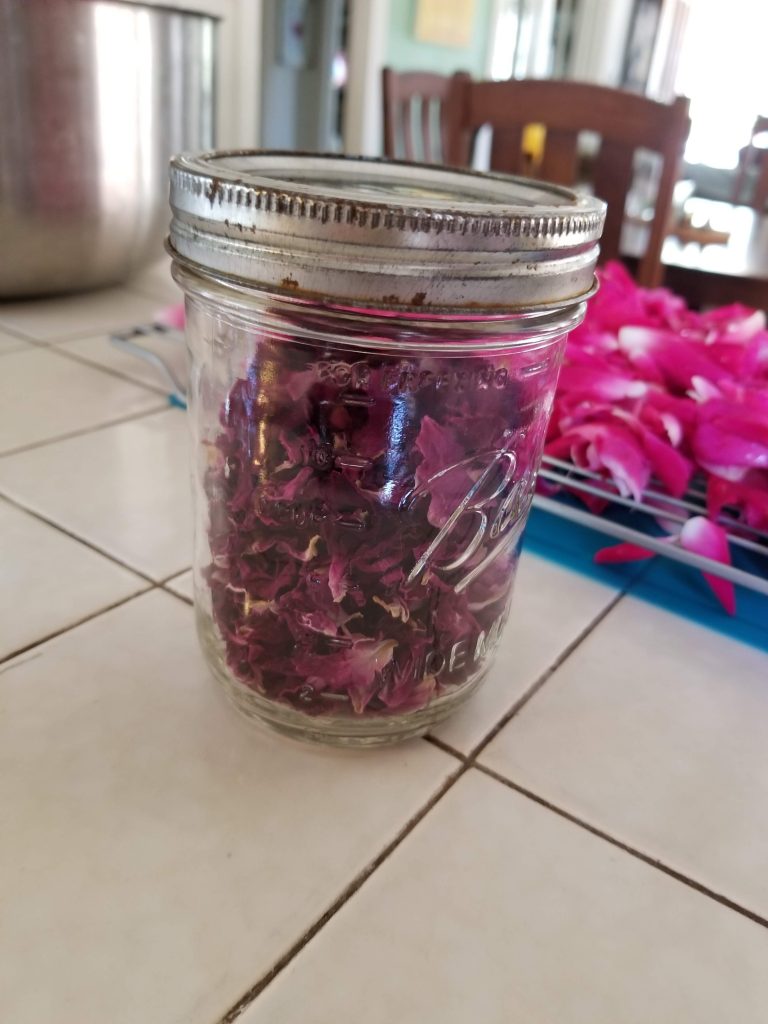
dried rose petals

Of course, I have also been drying rose petals so that I will have a supply handy when needed. I have only begun to scratch the surface of uses for rose petals!

Kitchen Adventures – Cat Cookie Edition

My friend, S, gave me a set of cat-shaped cookie cutters for Christmas.  When giving them to me, she mentioned that she had seen something on Instagram about tie-dyed cookie decorating and thought that we could make tie-dyed cat cookies.

Well, you can’t just hang a statement like that out there.  I made her pick a date and commit to coming over for cat cookie making.

Now, I’m going to let you in on a little secret: I am not much of a cookie decorating kind of gal. I’m okay with the baking part, but I just don’t have whatever it is that you need to rock at cookie decorating (I’m pretty sure that whatever is a bunch of special equipment). However, I am also good at not letting being bad at something ruin my fun. So, I was not about to let an opportunity to play cat cookie bakers with my friend pass me by.

I made the cookie dough the day before. It never hurts to have well-rested overnight in the refrigerator cookie dough to work with.

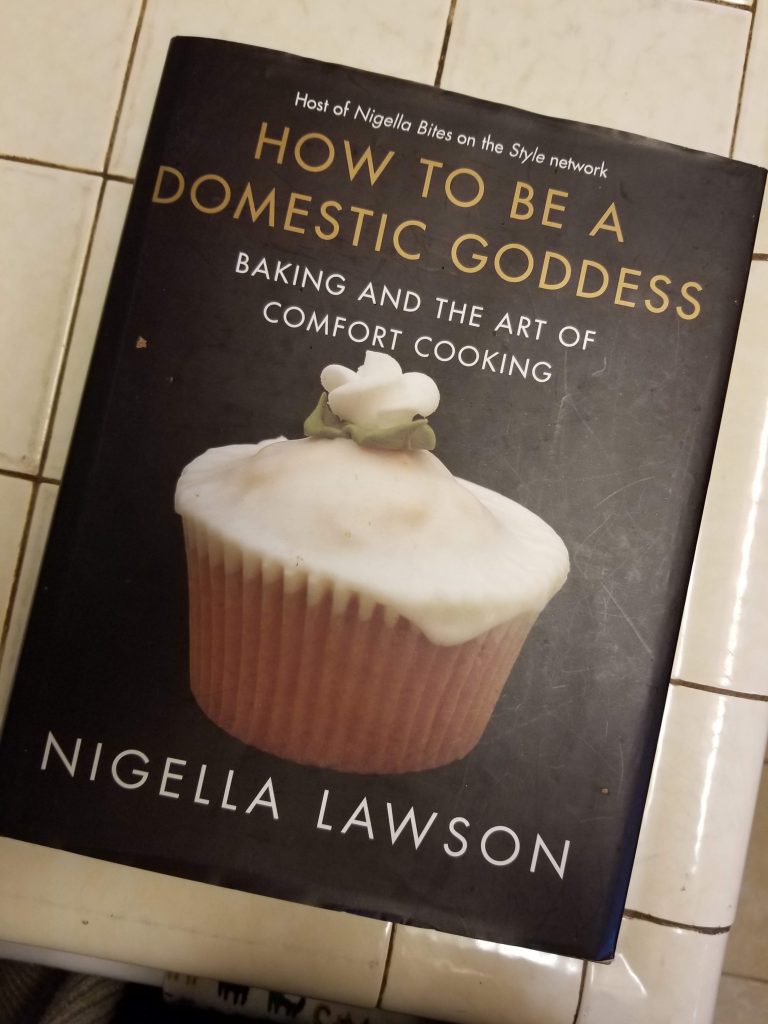
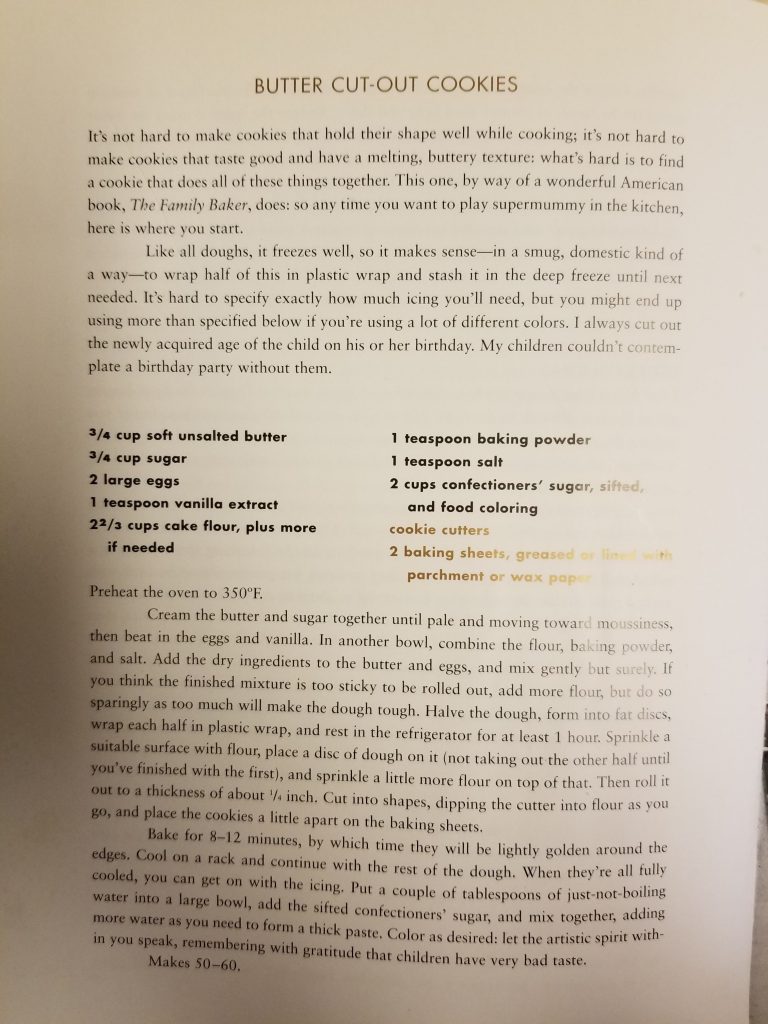
I love Nigella Lawson’s Butter Cut-Out Cookies recipe from the How to be a Domestic Goddess cookbook. Whatever they wind up looking like, the cookies are just sweet-enough, just buttery-enough, just dry-enough, and a little salty. I like to substitute almond extract for the vanilla, but other than that, I wouldn’t change a thing.

I waited for S to come over to start baking because I find that whole rolling out dough, cookie cutter, transfer to the baking sheet business to be very tedious.  I was so glad that I did because it was almost fun since I had another person there to talk to.

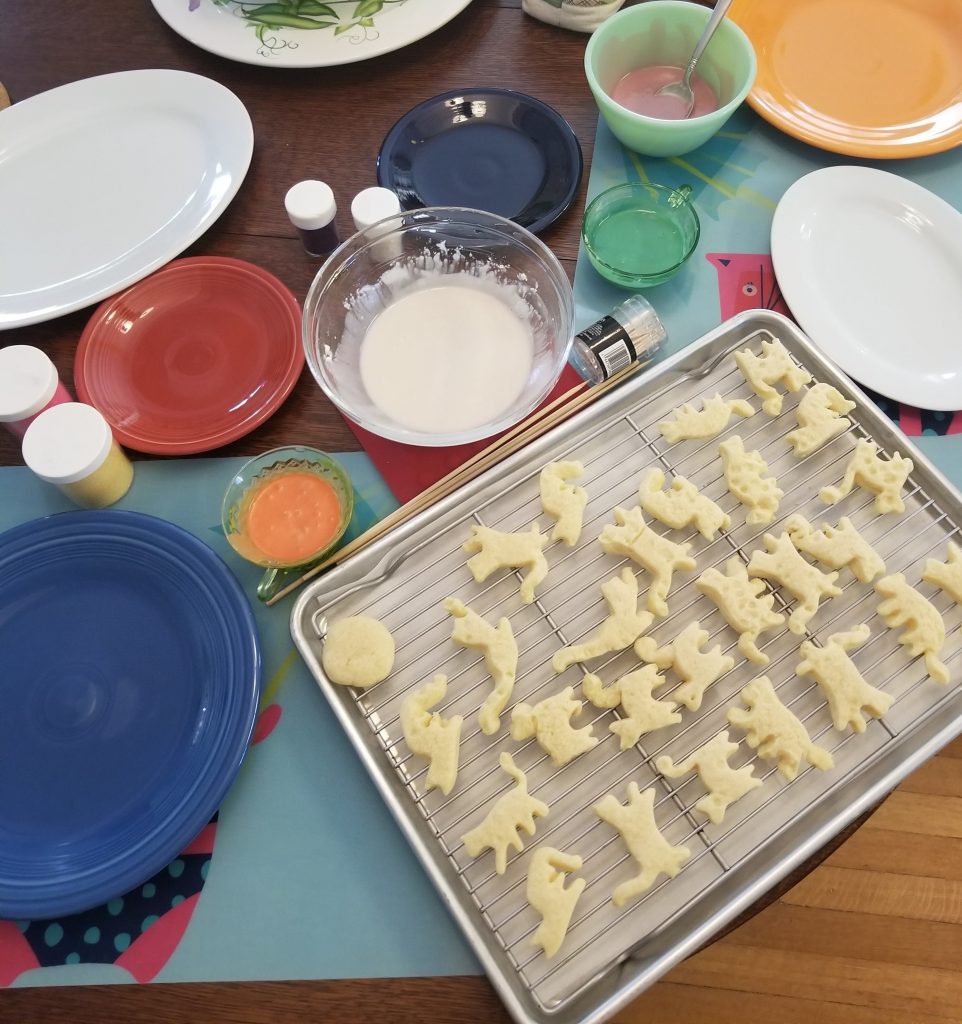
Once we managed to get all the cookies baked, we threw that round of dishes in the sink and rested up with some snacks while the cookies cooled.  Once we were sufficiently snacked and rested, it was time for adventures in tie-dye cookie icing.

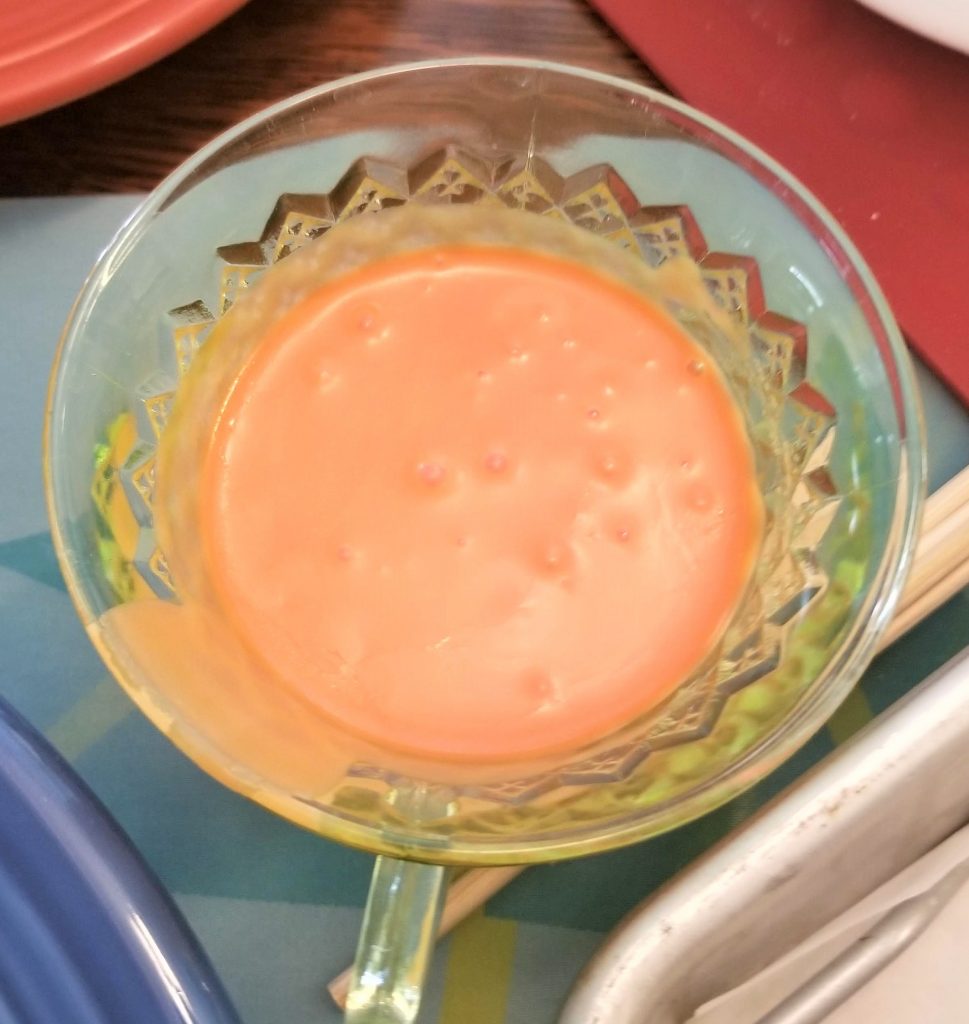
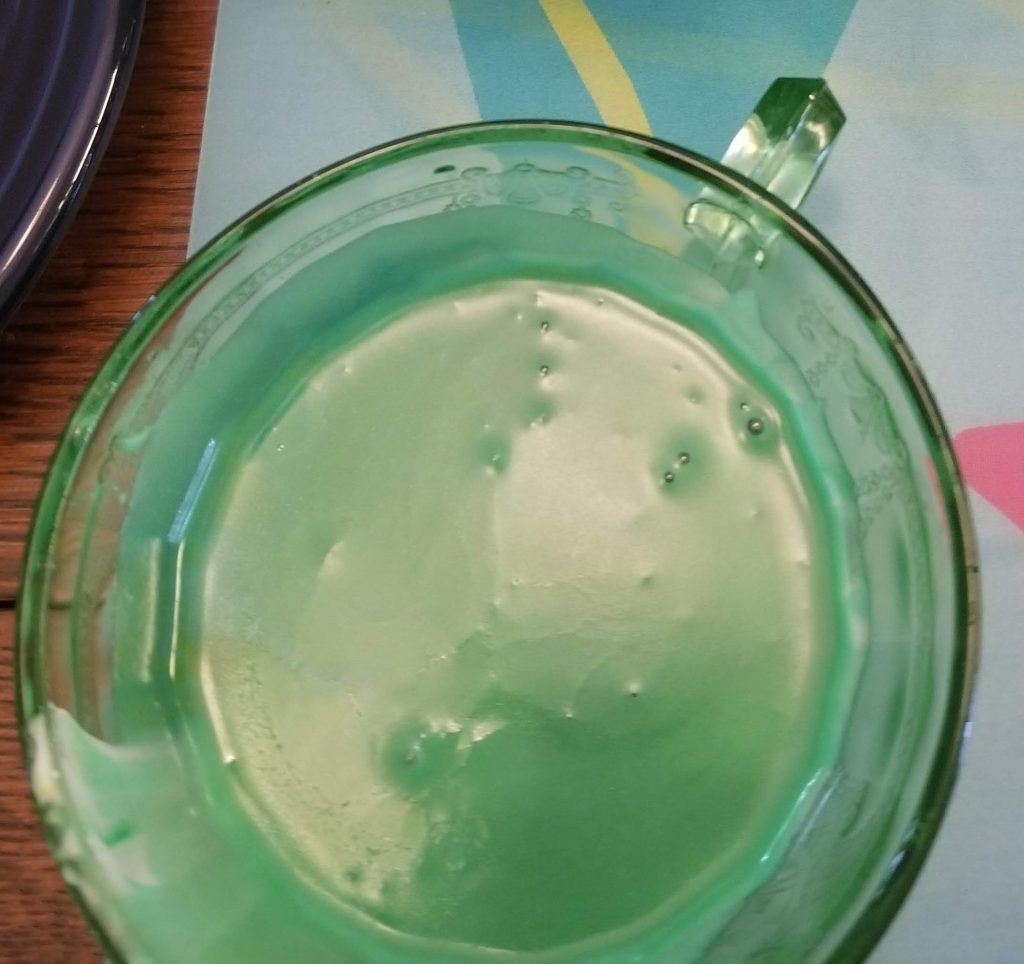
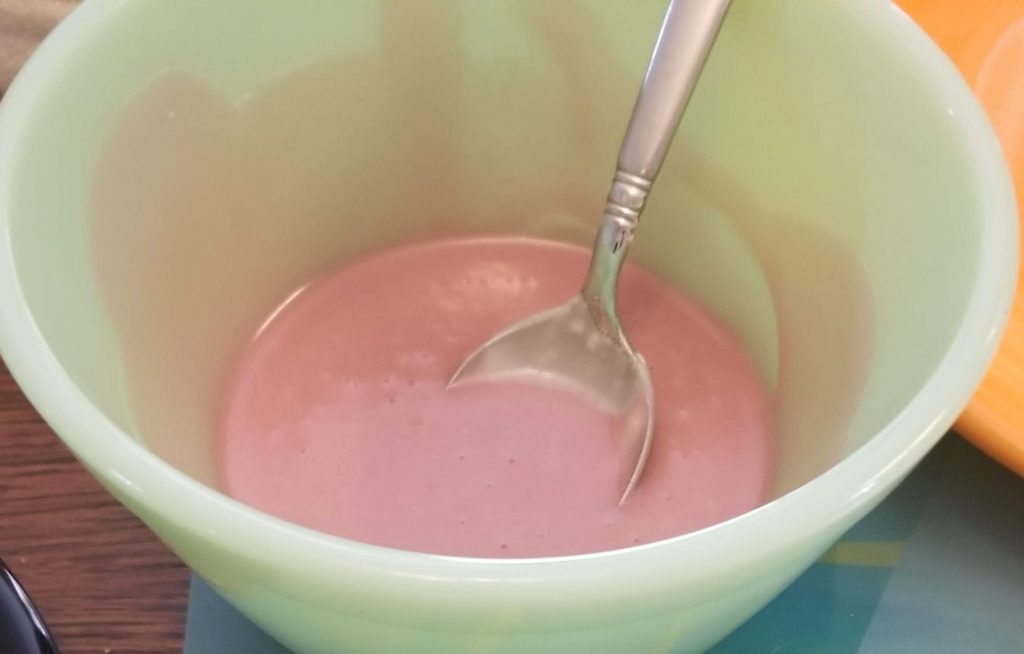
We made up a big bowlful of icing (aka wet powdered sugar) and then divided it into bowls.  S was in charge of the food coloring and she did a great job.  We had tangerine sunset, teal, and raspberry sherbet, to play with.

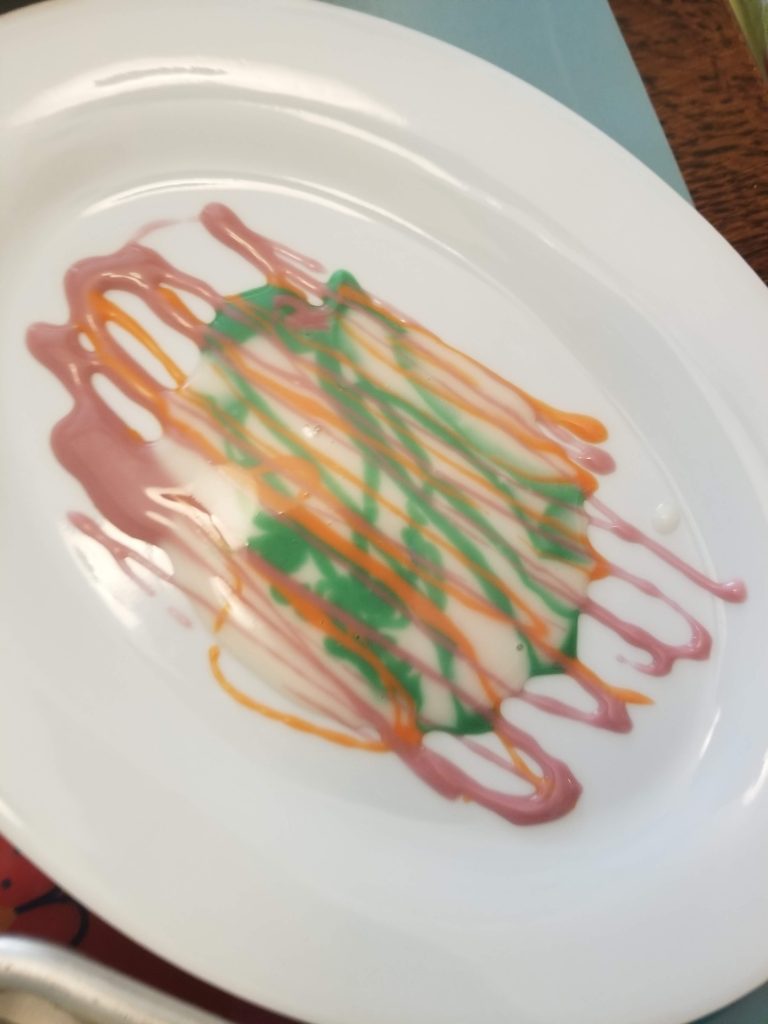
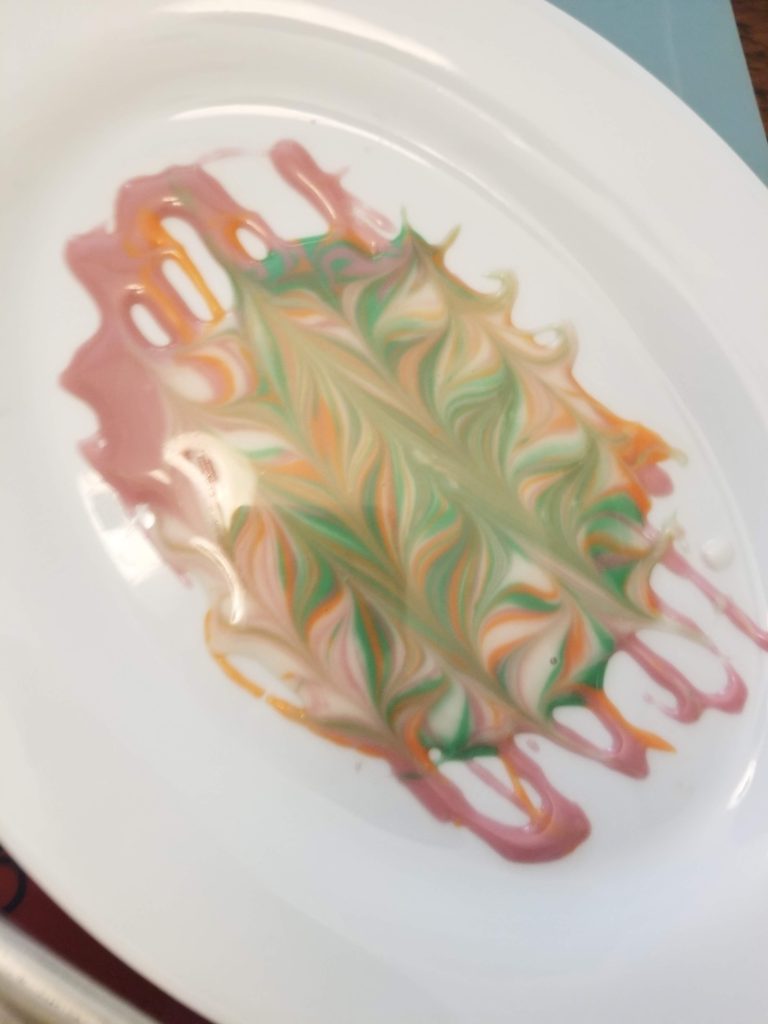
According to the YouTube video she had watched, you start with a base of white icing, drizzle the colors on top, rake through it with a toothpick, then plop the cookie, twisting as you lift.

Our results were somewhat lackluster.

We experimented with all sorts of things. It was all a mess. Finally, we decided to go for the drizzle technique.  First everyone on the tray got a white icing base coat. Then S drizzled tangerine sunset in one direction to make stripes.  I followed up with raspberry sherbet in another direction.  We decided to leave well-enough alone and not use the teal.

The end result was sort of a pseudo-preppy, abstract madras. More importantly we were done. Most importantly we came away with a newfound appreciation for those $7 sugar cookies you see in the bakery and without any delusions of wanting to go into the cookie decorating business.

Rainy Day Kitchen Adventures

It was a cold and rainy day. I decided to combat the gloominess with some kitchen adventures.

First up was scones.  I had never made scones before (they seemed complicated for some reason), but I discovered a Martha Stewart recipe that seemed pretty straightforward and I was feeling ready to try it.  The recipe called for some sort of dried fruit (cranberries!) that I didn’t have, but I did have just a bit of candied ginger in the cupboard that seemed ready to meet its destiny.

I discovered the great things about making scones: 1) you don’t wind up with a huge batch of something (at least not with this recipe); and 2) there isn’t a bunch of rolling out, cookie cutter nonsense, you just flatten the dough into a round-ish blob and cut it into wedges.

I’m going to guess that the thing that makes scones so scrumptious is that they are made with half-and-half. Probably most important is brushing the tops with half-and-half and sprinkling them with sugar before baking.

After I had munched a warm scone (or two), I was ready to move on to something a bit more savory.  Of course, cold and rainy day kitchen adventures wouldn’t be complete without soup!

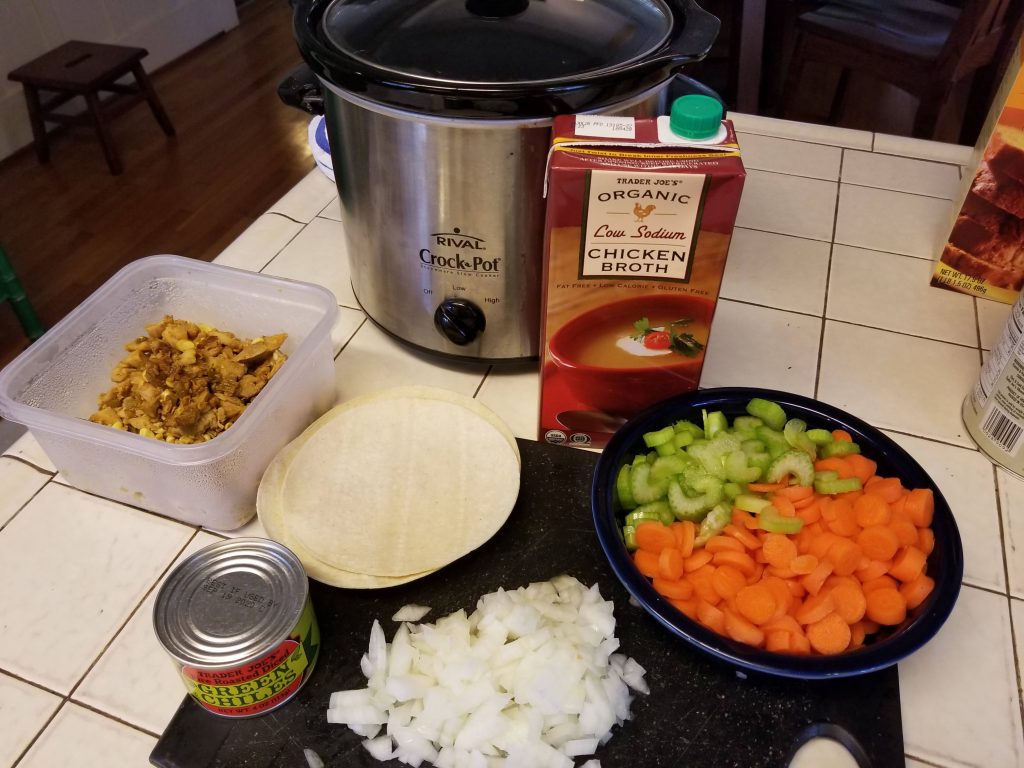
Mr. Man had made chicken tacos the night before and there was enough leftover chicken for a week’s worth of tacos. Or … chicken tortilla soup!

For the soup, I strictly adhered to the just throw a bunch of stuff in the crockpot and let it cook for as long as possible technique.

First, I chopped an onion, some celery, and carrots.  Those went in the crockpot with the box of chicken broth and can of diced green chilis.

After a couple of hours, I went to check on my veggies and started to get nervous.  I started to question why I wouldn’t have sautéed them up in a pan before throwing them in the crockpot?  What was I going to do now?  Those onions did not look like they were anywhere near melting into the broth the way that I wanted them to.  Oh well, at least I had another solid 5-6 hours for this to hang out in the crockpot.  Better keep it on high. 

I did go ahead and throw the chicken in at this point as if the pre-cooked chicken would set an example for the vegetables of what they should inspire to be. Because the chicken was already very seasoned, I didn’t really worry about adding any spices.

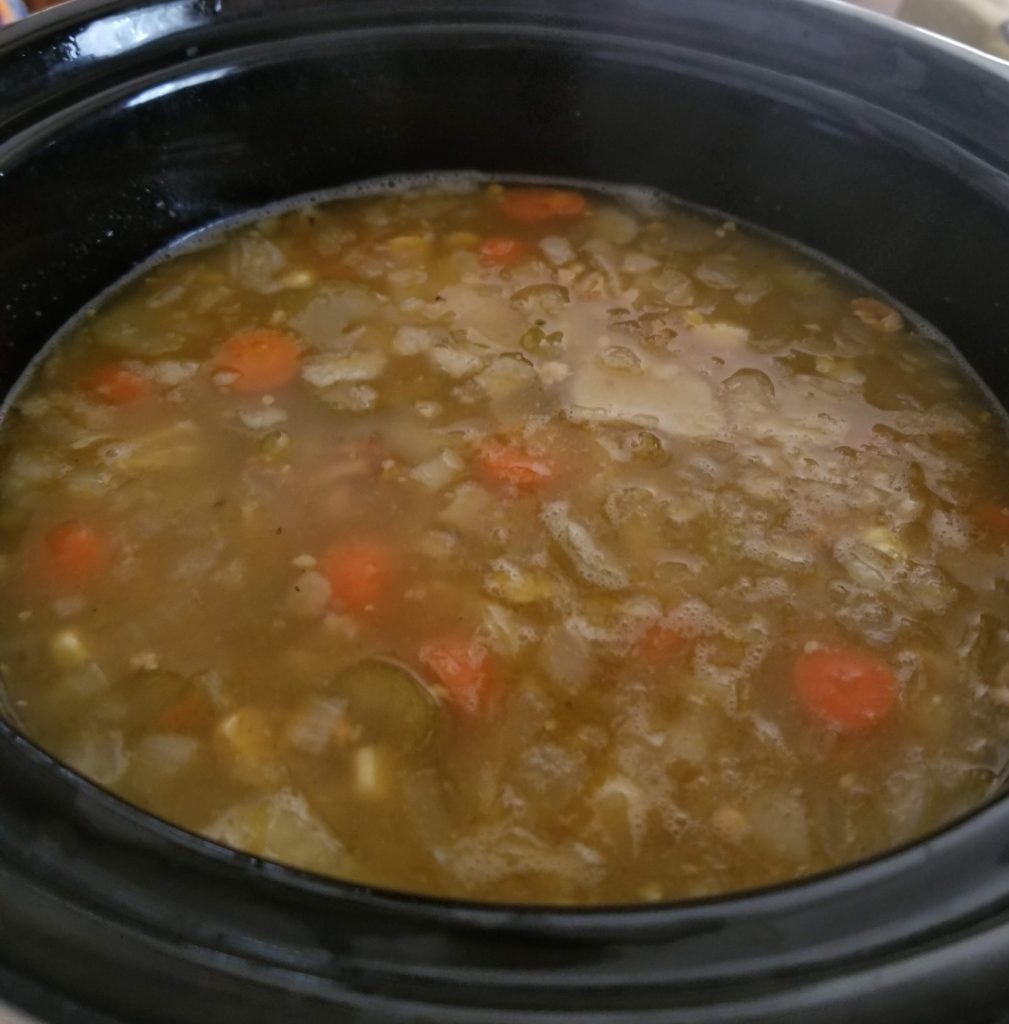
A few hours later I checked on it again.  Maybe it was starting to try to come together?  The carrots weren’t crunchy anymore so that must be progress.  At this point I tore up about six corn tortillas and added them to the crock to dissolve.

I just love the way that a few corn tortillas can add so much body to a really simple soup. They not only thicken the broth but add a dimension of flavor and subtle sweetness. Its one of those great uses for stale bread kind of kitchen tricks.

After all day, we had soup!  I served it with some homemade taco chips (oven-baked of course) a sprinkle of cheese, a bit of diced avocado, and a squeeze of fresh lime juice.  Mr. Man approved.

Adventures with Eggplant

I have to tell you, I have avoided attempting any culinary adventures with eggplant for a long time.  Sure, I’ve always been a fan of eggplant parmesan, who isn’t?  But it is something that I hadn’t wanted to try to make.  But recently, my obsession with the delicious, fluffy babaganoush at the Mediterranean restaurant down the street has motivated me to overcome my avoidance.

Babaganoush

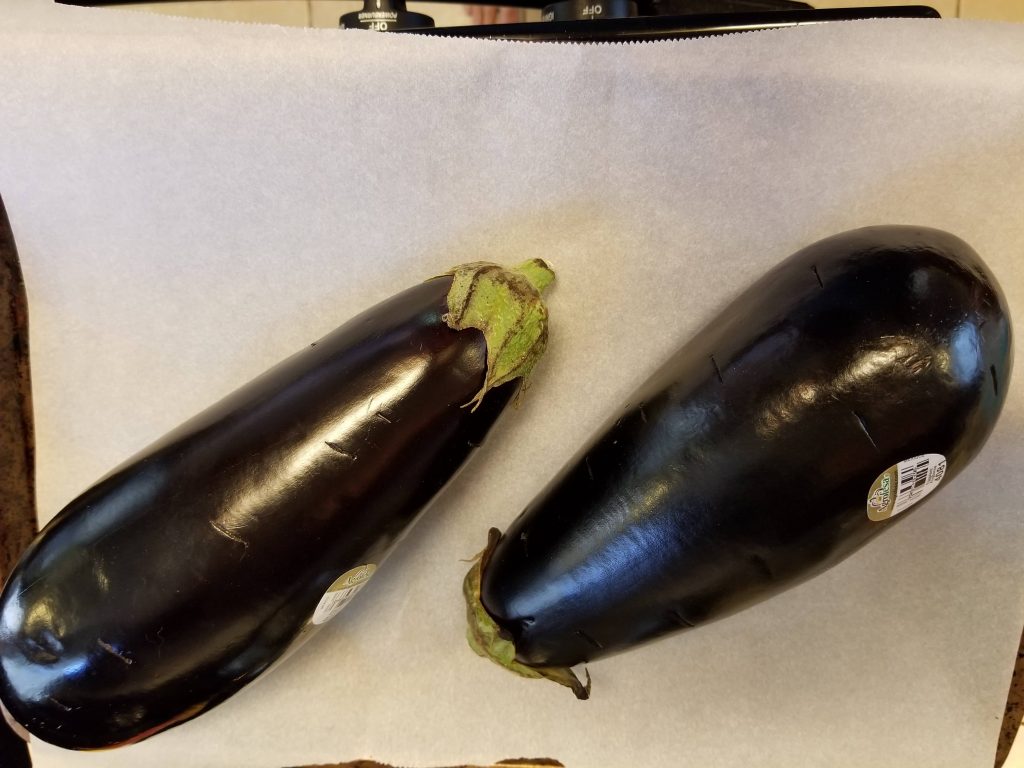
Once I decided to look up recipes for babaganoush, I realized that there was nothing to be afraid of.  I love any recipe that involves roasting something, and bonus points are given for anything that you don’t need to do anything to before throwing it in the oven (ok, a few punctures so that it doesn’t explode, but stabbing a squash is sort of a bonus stress-relief activity, don’t you think?).

Of course, since I was trying to find the laziest way possible to make it, I had some uneven results:

Experiment #1

I mostly followed a recipe from Pinterest. I roasted the eggplant at 400 for 20 minutes or so, until it was soft.  After it cooled, I scrapped the flesh out of the skin and put it in the food processor.  Then one clove of garlic and a sort-of homemade tahini (ok, it was just crushed sesame seeds), salt, and olive oil.

Results: the food processor wasn’t good at pulverizing all of the eggplant seeds. It came out with a gritty, lumpy texture.  I was going for light and fluffy and this wasn’t.  Also, the garlic was STRONG.  Like overpowering.  I’m a bit of a garlic wimp.  This wasn’t for me.

Experiment #2

Roasted the eggplant same as before.  Also roasted one clove of garlic with it.  This was a stroke of genius if I do say so myself.  You still get the garlic flavor, but it is softer, not so pungent.  This time I went after the eggplant flesh and the garlic clove with the immersion blender.  It worked great!  I didn’t even pretend to try to put any sesame anything in it this time. This batch wound up smooth and almost fluffy.  Now if only I had remembered the olive oil!

Experiment #3

Roasted 2 eggplants.  Threw in 2 cloves of garlic for last 5 minutes.  I’m not sure what happened but it came out pretty soggy.  Maybe because I didn’t let them cool all the way before peeling them?

I was a bit flummoxed and decided to take a break.

It turns out that babaganoush is a gateway dish that leads one down the slippery slope of exploring other adventures with eggplant.

A few months later, the eggplant display at Trader Joe’s called to me.  The eggplants were large and heavy and inexpensive (it must have been eggplant season).  I brought one home.  It was too hot to consider turning on the oven, time to find some instructions for cooking eggplant on the grill.

Grilled Eggplant

There are some fairly involved recipes out there.  You know how I feel about too many steps.  But I did decide to make the effort to brine the eggplant before throwing it on the grill.  The most challenging part about this step is figuring out how to keep the eggplant slices submerged in the brine, those guys really want to float!  But the effort to outcome ratio for delicious grilled eggplant is very reasonable.

  • First slice the eggplant into rounds, maybe ¾” to 1” thick. 
  • Then brine them for 30 minutes to 1 hour (dissolve 2 tablespoons of salt in warm water, then add cool water until you have enough to cover the slices). 
  • Then dry them off, get some olive oil and salt and get ready to grill. 
  • Here is something that I think is an important step: don’t oil the eggplant slices until right when you are going to put them on the grill.  And only brush and then salt the side you are putting on the grill. 
  • Then close the lid and walk away for 5 minutes.  When you come back, oil and salt the up side before you flip.

That came out so tasty that I’ve made it again.

I’m tempted to puree the grilled eggplant, but it is already so delicious why bother with the extra step?

Watermelon

Ah summer, I love it so much.  One thing that I love about summer is watermelon.  I don’t think about it for the rest of the year, but when it is hot enough, it is one thing that is always on the crave list. I love to just eat it plain, but there are so many other, easy, fun things to do with it.

These days the powers that be have engineered watermelons to a manageable size (and the seedless part sure is nice too).  But what are you going to do when you ask your husband to pick up a very small watermelon and he comes home with a basketball?

Watermelon and cucumber salad

  • Watermelon (cubed)
  • Cucumber (try to get it roughly the same size as the watermelon)
  • Lime juice
  • Fresh mint
  • Feta

Toss together and serve.

Watermelon water

You can buy bottles of delicious watermelon water at the store if you’re thirsty RIGHT NOW.  But if you have enough time to chop up a watermelon, you can make your own at home.  Just fill your blender with watermelon bits (no need to worry about nicely chopping it) and blend it up.  Yum!

Watermelon margaritas

Since you already have a blender-full of watermelon water, why not put it to good use and make up a batch of margaritas?

  • Blended watermelon water
  • Trader Joe’s Jalapeño Limeade
  • Tequila (I like silver)

Give it another whirl in the blender and serve over ice.

*note: I may have been testing this recipe before writing this post, hence the lack of measurements (just use your own best judgement, it will be fine!).

One thing that I haven’t tried yet, but it is on the list is:

Watermelon Sorbet

  • Watermelon
  • Sweetened condensed milk

Blend. Pour concoction into the ice cream maker.

When I was growing up, I used to make watermelon sorbet with watermelon and I think simple syrup in the ice cream maker.  It was so delicious served with a sprig of fresh mint on top!

What do you like to do with watermelon?