Adventures in Landscaping

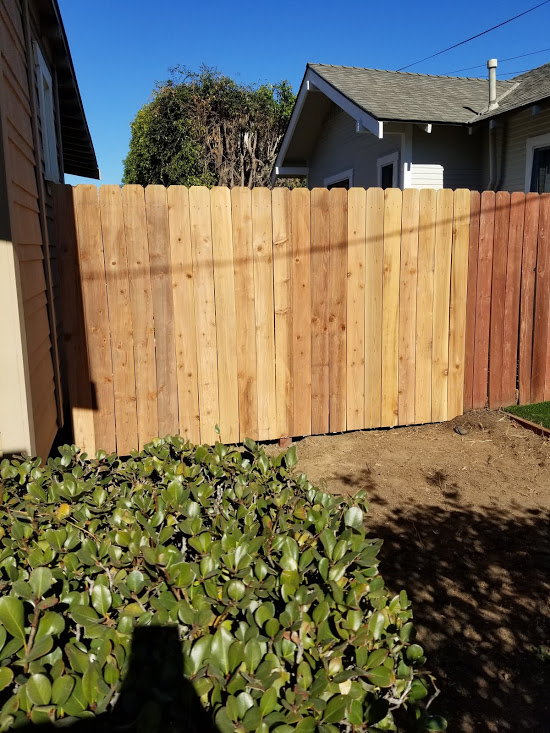
It’s time for an update on my little side yard project. In January I shared about how we finally got a fence between our property and the place next door and how that started a whole chain reaction of what I am calling my adventures in landscaping.

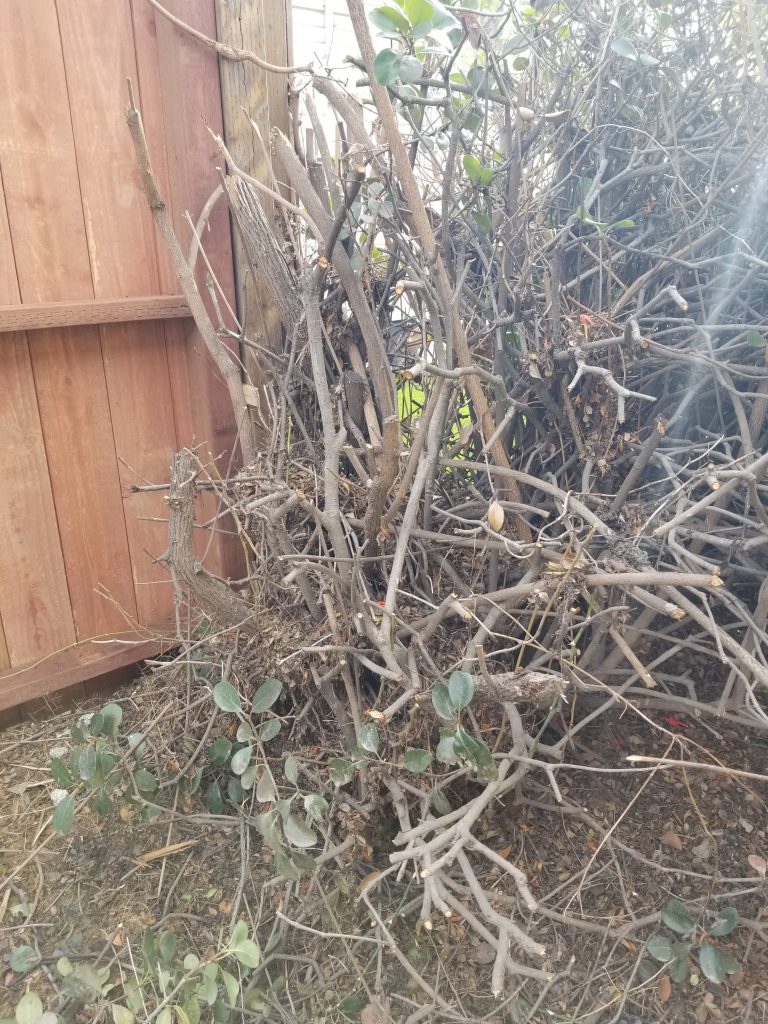
That side of the house had been an eyesore for years and years and years. Because it is shady for most of the day, it was never suitable for any serious gardening. Sometimes I imagined turning it into a little meditation garden/sitting area. Then I would walk out there and behold the magnitude of such a project and put that idea back in the maybe someday idea file. But once the fence happened, I was ready to at least give it a shot.

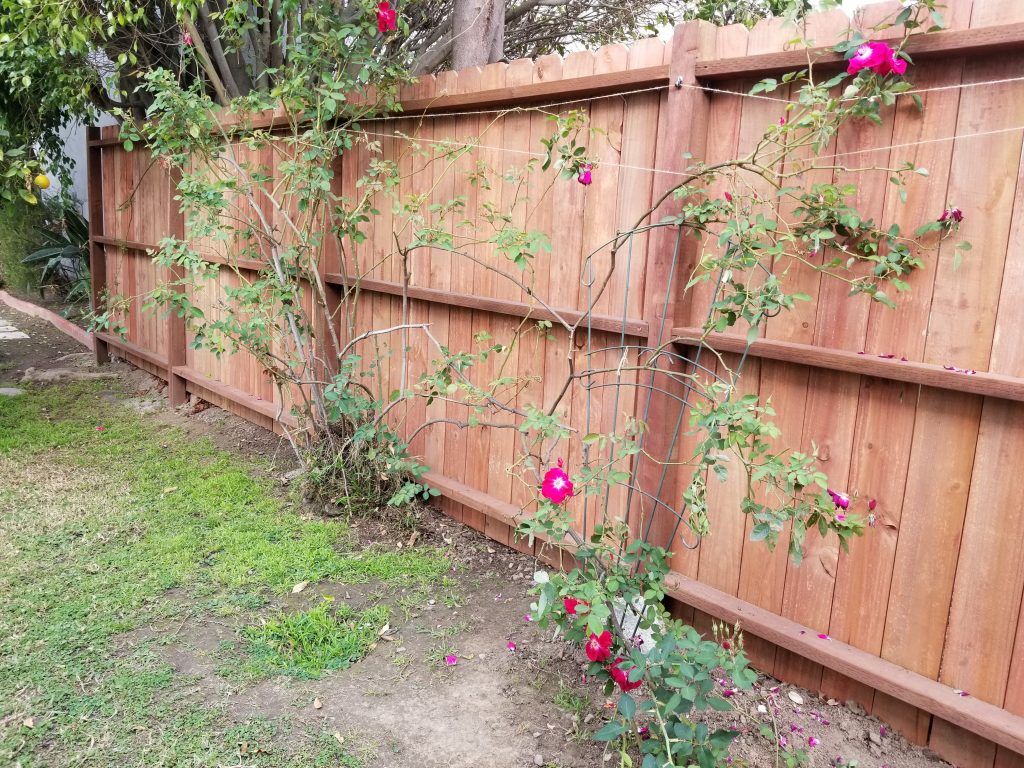
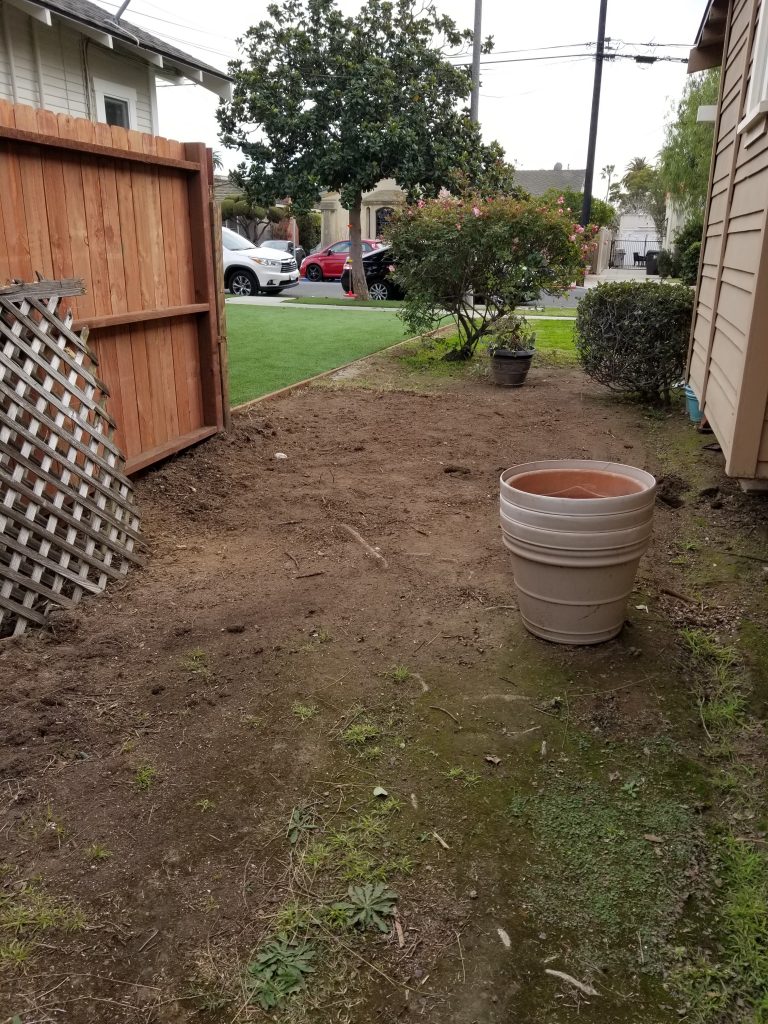
After the what turned out to be a car-sized bush was removed, it was Mr. Man’s turn to get to work building a fence to divide the front/side yards. Suddenly, I had a whole little private oasis … well, it wasn’t much of an oasis, but it was finally private and had potential for oasis-ness. What to do?

Our very lovely landlady mentioned that she had a bunch of tiles in her garage that we were welcome to use to build a patio (she and I had talked about doing something to the side yard years ago, but until the property owners next door were ready to do something about the fence, there was no reason). Up to that point, my best idea was just putting down pea gravel. But a patio! Yes please! I was ready to get to work.

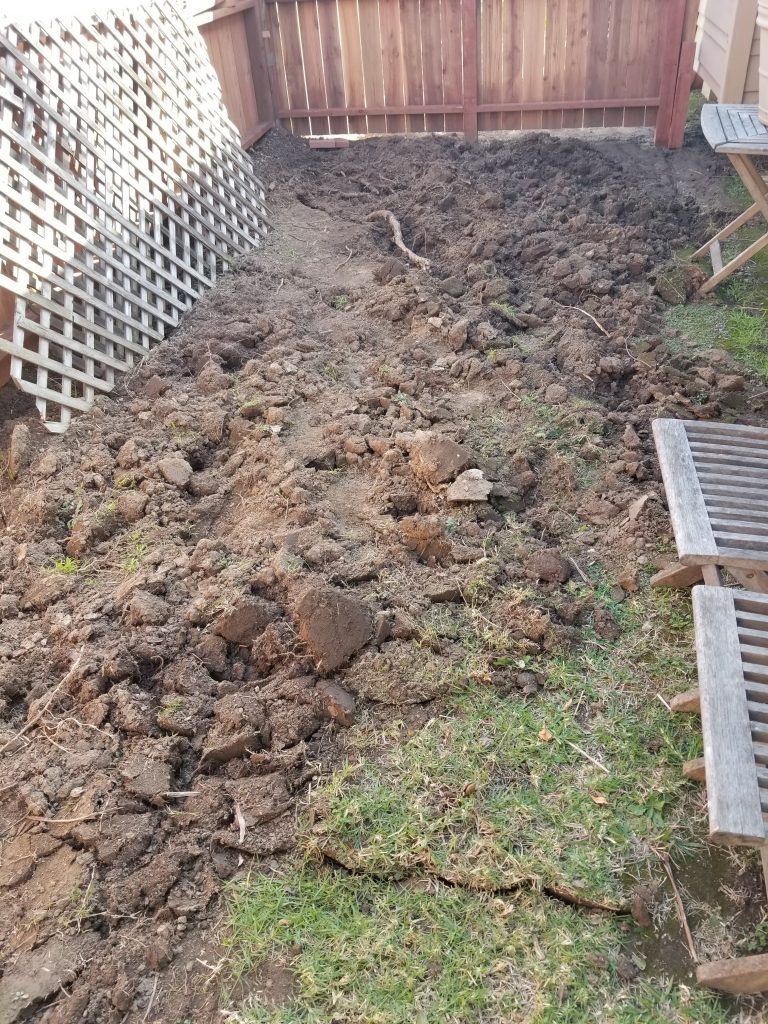
And so, adventures in landscaping continued as phase two of the side yard beautification project got underway (phase one had been the fencing). While perhaps some would look for professional help or rent power tools, I just started digging.

There is something relaxing about just digging in the dirt for the sake of digging in the dirt. I spent hours out there. There was so much to notice about the ground, how it sloped, how it could change from hard and dense to fluffy, how many earthworms were in there (who I kept stopping to transfer to my vegetable garden). Maybe it already was a meditation garden of sorts.

Mr. Man does not find digging as meditative as I do, so for everyone’s happiness, we agreed that I would focus on the digging and he would focus on providing support (encouragement, knowledge, supplies, and tools).

After several days of digging, it looked like I had done enough to be able to move on to the next step, whatever that was. Fortunately, Mr. Man had been researching and laid it all out for me.

Before any actual patio building could take place, we needed to define the footprint. I knew what I thought would be the ideal area, but my eyes tend to be bigger than my stomach if you know what I mean. Mr. Man had the good advice to figure out how many square feet of tile I had to work with before I over-committed.

Ah! Math! Alright then. Eight feet by twelve feet sounds about right.

Next week I’ll tell you all about how the plan came together.

Wintertime Gardening

Living in southern California means that winter isn’t really a reason to stop gardening. In some ways, it is the best time for it – the cooler days and occasional rain can help to make yardwork a little less strenuous. I was working on a story for my community association newsletter about wintertime gardening and in the process found myself falling down the rabbit hole of my own wintertime garden project.

The person I was interviewing about wintertime gardening likes to spend this time of year moving dirt around, creating new garden beds and such, but she calls it terraforming which makes it sound so much more serious. I realized that I was terraforming too – taking advantage of the one rainstorm that we’ve had to dig up some things while the dirt was soft. Of course, that one chore created a chain reaction and now there is a whole project happening.

You see, the people next door recently completed some work on their property. The payoff for putting up with two months of incessant construction noise and nuisance was that they built a fence along our shared property line (this has been at the top of my wish list since forever).

Look at that beautiful fence! Now I just have to get my rose bush to cover it.

Once the fence was up, the mounds of overgrown day lilies had to go. With the help of our so far only winter rainstorm, I filled two trashcans with shoots, roots, bulbs, and other bits. This was the first phase of my terraforming – digging up the mounds and then filling in the resulting holes.

With the day lilies cleared, my dream of creating a little patio on that side of the house finally seemed possible and I was eager to get to work. My enthusiasm for this patio endeavor was contagious enough to convince Mr. Man to get on board. His first assignment is to build a fence to separate the front and back yards.

Until now, the only thing screening that side of the yard from the street was an overgrown bush. We probably would have just left it, but it was in the way of where the fence needs to go. After I began hacking at it with my hedge clippers, I discovered that it was a job for power tools. Since our nice gardener has a chainsaw, I asked him to help. This bush was the size of a small car and I don’t even want to tell you the kinds of things we found inside of it, fortunately the gardener hauled it all away.

Once Mr. Man gets the fence up, we are going to reroute some irrigation, then it is time for patio building! The ground over there is lumpy and not level so there will be more terraforming in order to prep the space, but when we’re done our wintertime gardening project will be ideal for summertime sitting. I can’t wait to show you how it turns out!

Rose Petals by Any Other Name

Recently, I have had an overwhelming urge to make the most of the natural resources around me. Anything growing in my yard (or my neighbor’s yard) has been fair game. Among the many, various, ridiculous things that I have been up to, one of my favorites involves rose petals from the wild, old-fashioned rose bush in my backyard.

This rose bush has those wonderful, fragrant blooms that open all the way up and immediately fall apart. So as much as I would like to bring them inside and put them in a vase, they are terrible roses for cutting because as soon as a bloom opens, it begins to disintegrate.

It turns out that there are more uses for roses than just looking at. Since I’m a fan of the Trader Joes rosewater facial mist, I wondered if that was something that I might be able to make myself. And so, I began down a rabbit-hole of things to make with rose petals. Rose petals are anti-inflammatory and high in antioxidants. That is why they are such a popular ingredient in fancy skincare things. The lovely smell is a plus.

*If you are going to make anything with rose petals, make sure that they haven’t been treated with pesticides.

First, I decided to make rose water. It sounded like a nice thing to do. Rose water can be used directly on the skin or hair and can be ingested. There are two methods for making rose water: extraction and distillation.

Extraction involved putting rose petals and water in a pot and simmering gently.  When the rose petals lose their color, your extraction is complete. Strain out the petals and store the finished rose water in the refrigerator. Mine comes out a sort of dark pink/brown color.

The distillation method sounded like it would involve all sorts of equipment and knowledge, but I was delighted to learn can be undertaken at home as well. I felt so science-y! For this technique, put a heat-proof bowl in the center of a pot, then surround it with rose petals and water (I used roughly equal parts fresh rose petals and water). Place the lid on upside down and place ice packs on top. This encourages the condensation to collect in the bowl in the center of the pot. Again, a low simmer is best and once the petals have lost their color, you’re done.

Here’s the thing about distillation: it yields much less rose water although it is clear and said to be of higher quality.

What I consider a bonus is that you still wind up with a good amount of extracted rose water in the pot, so you might as well save that too.

full yield of distilled rosewater in front, half-empty jar of extracted rose water behind

I’ve been using my rose water as a toner and my skin loves it, especially if I’ve gotten a bit too much sun.

Next, I took rose water one step further and made rose syrup. I followed the extraction method then immediately added sugar to the warm, strained rose water (one-part sugar to two-parts rosewater worked for me) and stirred until it was dissolved.

This produced a delicious smelling if still unattractive brown-ish result. But when used for a cocktail it creates a delightfully pink drink.

Rose-y Gin Drink (help me come up with a better name please!)

  • 2-parts gin
  • 1-part fresh lime juice
  • 1-part rose syrup
  • Shake with ice
  • Serve up

Rose syrup is a common ingredient in Persian desserts (rose ice cream for one, which I do intend to attempt soon). There are probably also fun ways to use it in baking which I probably won’t get around to for a while.

dried rose petals

Of course, I have also been drying rose petals so that I will have a supply handy when needed. I have only begun to scratch the surface of uses for rose petals!

Around the House

What have you been up to around the house?

We have all been at home for a long time now. Have you been doing quarantine-inspired stuff around the house? You know what I’m talking about:

  • Make banana bread (check)
  • Make bread (check)
  • Make that fluffy coffee (I haven’t tried this yet; I worry that it might be too delicious and take over my life)
  • Clean your closets (at this point, I only need the clothes in my sweatpants drawer, but I might regret getting rid of everything else, so I’m holding off)
  • Take an online class (check)
  • Crafts (check) *more about this later
  • Gardening (check)
  • Marie Kondo your whole house and garage (Ay caramba! No way!)

The list of possibilities is endless really. I’m sure that I’ve missed some good ones.

I haven’t done anything major, but I have done a few little things here and there that have really made a big difference in how I feel about my home. For me, when I finally break down and do something that I’ve been avoiding, I know that it was worth it because I feel taller when I’m finished.  I know, it’s a little strange, but there is no other way to describe it.

For me, sticking to little, bite-sized projects is key. When I think of a big project that I’ve been wanting to magically take care of itself (like reorganizing the kitchen), I get a feeling of dread that quickly leads to anxiety and avoidance. So, I have been thinking about my kitchen reorg as a bunch of small projects. Sometimes I do one a week … or less, but it’s not so overwhelming. In that spirit, reorganizing the kitchen became:

  • Clean the refrigerator (like where you take the shelves out and wash everything)
  • Move the coffee maker
  • Find a place to store the ice cream maker (even though we use it a lot, it doesn’t need to live on the counter)
  • Clean the cupboard under the sink
  • Find a new home for that silver tray that has been living on the counter for the past XX years
  • A bunch of other stuff that I haven’t started thinking about yet

Even cleaning the refrigerator was tackled one shelf at a time. It doesn’t matter that I did it slowly, I still felt taller when I was finished.

I’ve also made some progress with consolidating/organizing/purging some of my other clutter catchers. Sometimes, just moving whatever doesn’t belong out of a particular location is enough to jump start some sort of resolution to the issue, like when I collected the various piles of books from the various locations around the house into one, big pile in the middle of the living room. I may have had to stare at it for a week, but one day, motivation took over and I organized the whole mess (including re-homing many).

book stack
some of the books that were re-homed

Anyway, I was feeling relatively productive and accomplished about staying home until I saw this story about an artist who is painting flowers ALL OVER her home. It is so whimsical and happy. I mean, look at those doors!

I don’t think that I’m going to start painting flowers everywhere, but I do think that I will keep trying to find little ways to make the most of my home. How about you?  Have you tackled any around-the-house projects?  Did you feel taller when you finished or is that just me?

Kitchen Scraps Garden

So, I went cheap on my veggie garden this summer.  Like REALLY cheap.  Instead of taking a big trip to the nursery and buying baby plants and/or seeds, I decided to see if I could grow some kitchen scraps. I am excited to report that it seems to be working (at least so far).

Huh?  Kitchen scraps?  What?

Well, it all started one day when I was making something with green onions. I hacked off the bottoms and instead of tossing the little root ends in the trash, I decided to go stick them in the garden and see what would happen.  They grew! And I could go pull one and stick the end back in the dirt and it would grow again!  I love having green onions handy like that.  So, I decided to see what else I could get to re-grow.

I picked celery and romaine lettuce for my next attempt.  These guys got a fresh cut to the bottom of the heart (since they didn’t already have roots starting like the green onions) and kept them in a little cup of water on the kitchen windowsill. They started growing leaves right away. I kept them in the window and just changed the water every couple of days.  Eventually I had the starts of some roots.  So, into the garden they went.

Celery didn’t miss a beat, but I was worried that I might lose the romaine.  So, I watered and watered and told him nice things and he got his bearings and started to thrive.  One of each is not going to be enough to keep me from having to go to the grocery store, so I think I will have to try my windowsill technique on some more kitchen scraps until I have a more robust little crop.

I also planted the end of a sweet potato that I had left sitting around long enough that it has sprouted.  The vine is doing great, I am hopeful that I might wind up with home-grown sweet potatoes at some point as well (I might not, someone was telling me something about having to plant the eyes of potatoes…so I don’t really know what is going to happen, it will be fun to find out!

An extra surprise treasure was that once I started watering my kitchen scraps, a little, baby tomato plant sprouted up.  Poor thing was probably a seed from one of last year’s abandoned cherry tomatoes.  At least now he has a reason to grow up and he won’t just be a lonely seed waiting for his moment of greatness.

One unintended consequence of kitchen scrap gardening is that I now have an overwhelming urge to start composting.  Why not let the rest of those kitchen scraps go to good use?  I’ll let you know when/if I get around to it.

The Pumpkin Report

Remember when I said that I would tell you how my pumpkin patch turned out?  Oh, I was so full of hope then. I was sure that we would be drowning in pumpkins, that I would have given as many as I could to my neighbors and explored many pumpkin recipes.

Well, I don’t have any of those problems.

I don’t know what happened!  Guys, it all started off so well.  Mr. Man plopped the seeds in the garden. We had sprouts before we knew it!

They were growing and growing.

So many plants, with so many potential pumpkins.

Our future was looking like it would be FULL of pumpkins.

Then it all started heading south.  This guy committed suicide, he just dropped off the vine onto the driveway.

Inspector Sally examining the evidence, he determined that there was no foul play

The one, respectable-looking pumpkin got this icky spot, yuck!

And then all the plants suddenly pooped out. It was a gardening massacre.

So, now that it’s too late to do anything about it, I decided to do some research. The top Google result, The Old Farmer’s Almanac (https://www.almanac.com/plant/pumpkins), sure had everything that I needed to know about growing pumpkins.  Too bad that I didn’t read up before we started!  Here are my top take-aways:

  • Pumpkins like hot soil, which explains why they took off so well in our raised planter bed. You’re supposed to build little “hills” for your pumpkins to grow on to help keep the roots stay warm.
  • You also need to keep the soil moist – mulch, mulch, mulch.
  • And feed, feed, feed – manure or compost plus high nitrogen fertilizer (during early plant growth) and high phosphorus fertilizer (once blooming begins).
  • You need to be careful about getting the plants wet. I think this is the biggest booboo that we made since Mr. Man likes to water the garden from across the lawn.  Once the leaves got powdery, it was over.
  • If/when you start to get fruit, place something (ex: cardboard) under the fruit to keep them from getting icky spots from sitting in damp mulch.
  • If/when you pick them, keep 3-4” of stem to help them last longer and cure them in the sun for a week before storing.

Now that I’ve armed myself with some knowledge, I think we can attempt pumpkins again next year with the potential for better results.  As far as this year goes, I see a trip to Trader Joes for pumpkins in my near future.

Halloween Decorating

What can I say, I like decorating my yard for Halloween! We live near an elementary school, so the effort totally pays off in appreciation from little children.

When I first started decorating for Halloween years ago, no one else in the neighborhood was playing along.  Nowadays I’ve got the next-door neighbors making a point of out-doing me and a good number of the houses all the way down the block getting into the spooky spirit!

Headless Mr. Man isn’t scared of vampire lawn flamingos

My cornerstone decoration is Headless Mr. Man.  He sits out on the front porch every year and probably startles me and my living, breathing Mr. Man more than everyone else (what is that guy doing on my front porch?!). Originally, Mr. Man did not appreciate the awesomeness of some of his old clothes stuffed with newspaper sitting in a chair, but one day a junior high kid walking to school let him know it was cool and since then I get slightly less grief from him about it.


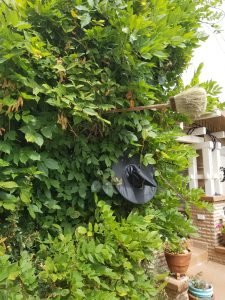
I used to make a point of putting all my decorations out at once and then that was it.  This year, I’m taking it a bit slower because I don’t want to put out the gravestones until I get the witch who crashed into the wisteria bush fleshed out a little bit better.


Next door apparently has a giant spider invasion.  This guy will probably catch himself a kindergartener or two before the month is over.  Come to think of it, I haven’t seen my neighbor much recently.  Hmmm…


Now, I’m going to show you some photos of my all-time favorite decorations.  I thought this house was the BEST and would go out of my way to drive by as often as possible.  I mean, this shipwreck! You should have seen it at night!  There were lights and a fan – I mean the wind – that would whip through the tattered sails.

This was the next year:

Apparently Wyle E. Coyote lived here

I always wanted to stop by or send them a card letting them know how much I appreciated their AWESOME decorations, but I never did.  And they moved away. I still wish that I had taken a moment to let them know.

Maybe someday, I will have an incredible pirate shipwreck and sea monster in my front yard.  I’ll add it to my list of things to do in-between things.

Gracious Living?

When I started conceptualizing this blog, I wanted to come up with catchy titles for each day’s theme.  Thursdays were going to be “Gracious Living”. Unfortunately, I was not clever enough to come up with comparable titles for the other days, so we’re just going to go with “Home & Garden”.  This day will be my opportunity to share decorating projects, entertaining tips, and kitchen adventures – the things that we all do to enjoy our time at home.  Don’t think that you’ll be hearing from an aspiring Martha Stewart. I’m more of a domestic survivalist than a domestic goddess. This is just another area that I try to make a little bit of an effort when I have the opportunity. Whether or not our pumpkin patch turns out, I will tell you all about it.

baby pumpkin

I’ve only recently gotten back into cooking on a semi-regular basis. My specialty is turning leftovers into tacos/burritos.  If left to my own devices, I would probably only eat things wrapped up in a tortilla.  When I do attempt cooking from scratch, the results can be interesting. I have a bad habit of not letting the fact that I don’t have all of the ingredients for a particular recipe stop me. What’s worse is that I can’t seem to stop myself from skipping steps or thinking that I don’t need to look at the recipe if I have already made something once (this never ends well).

I love to host little dinner parties and casual get togethers.  For one thing, I feel that it’s an obligation to retaining my collections of fancy china and vintage glasses. Aside from a way to rationalize having too much tableware, bringing the right mix of people together for a simple meal and interesting conversation always leaves me with a renewed sense of well-being.  I am working on getting back into the habit of hosting some sort of get-together at least every few months instead of only once or twice a year.

Other than the pumpkins which are currently taking over, our vegetable garden has been sadly underutilized.  By virtue of being accountable to you, I hope to make a better effort to grow an interesting variety of things that may wind up in my cooking trials.  I am also in the process of rebuilding a fairy garden at the roots my wisteria bush.  Because isn’t it nice to invite a little magic into your life?

This post concludes my first week of bloging.  I hope you’ve enjoyed my ramblings so far and will stick with me a bit longer.