Princess Cake

I generally like most kinds of cake but to tell you the truth, the one kind of cake that I love above all others is princess cake.  Even though her name is “Princess” she is the queen of cake in my world.

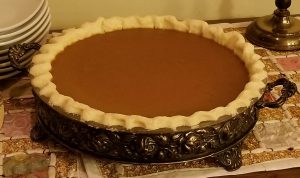
If you don’t know what princess cake is, it is a wonderful creation that begins with white cake soaked with almond syrup. One layer is filled with raspberry jam and whipped cream and the other layer is filled with pastry cream.  Then the entire delight is frosted with whipped cream and covered with a beautiful, pale green layer of marzipan.

Your mouth is watering, I can tell.

The other day, while mindlessly scrolling the ‘gram, I came across a Martha Stewart Living video of someone making Scandinavian princess cake.  Somehow, this video gave me the idea that I could actually make a princess cake myself.  Ok, not somehow, it was because all of the ingredients were already prepared – the cake was baked, the pastry cream and the whipped cream were chilled, etc. 

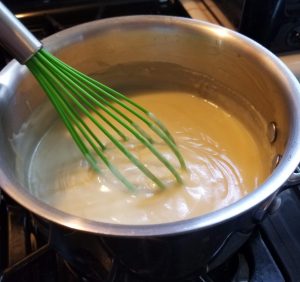
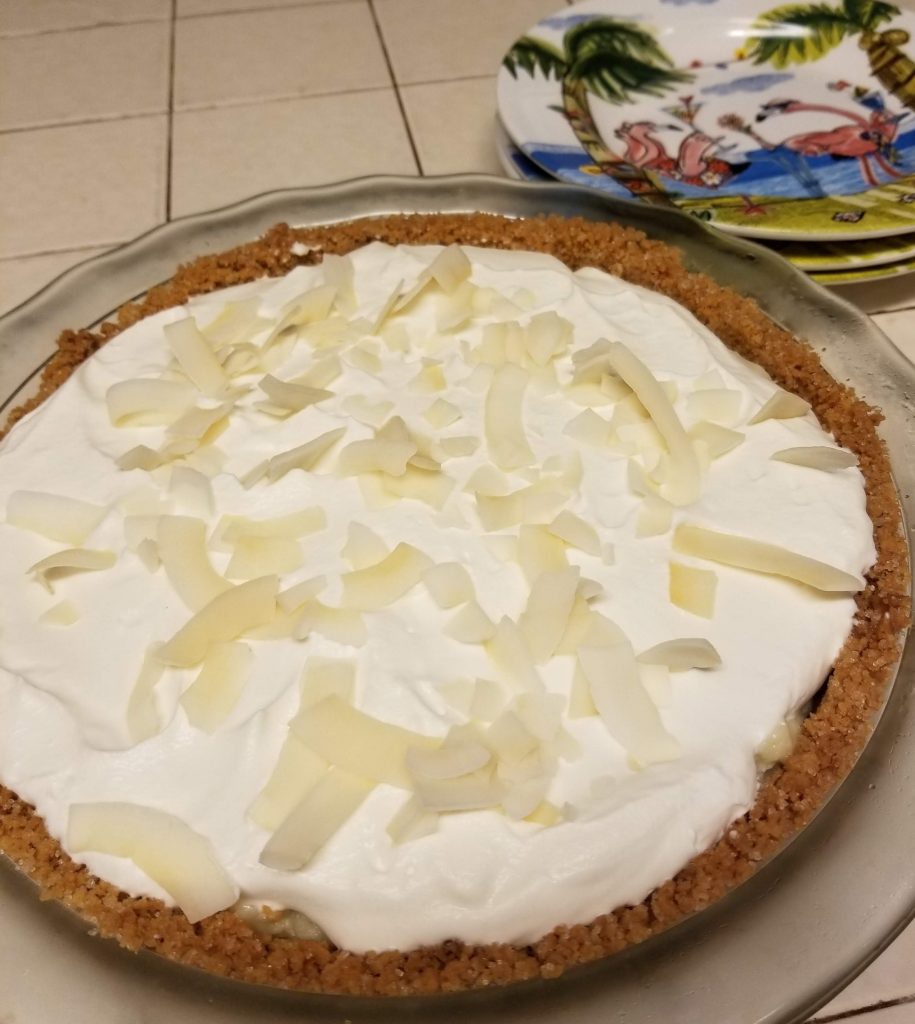
I overcame my fear of making pastry cream (Martha Stewart has a great recipe for “no fuss pastry cream” that I shared with you when I made coconut cream pie) during last year’s cream puff obsession. Since I had no intention to make raspberry jam, almond syrup, or marzipan myself, I felt confident that I had at least a moderate possibility of success.

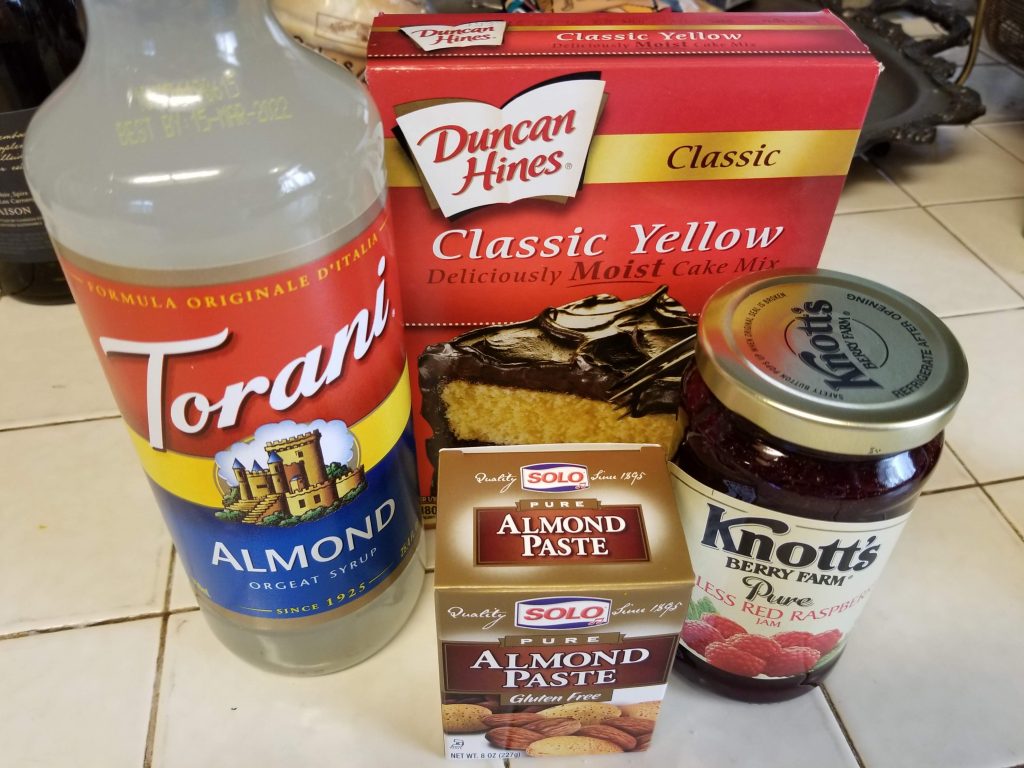
I assembled my ingredients and made the pastry cream a day ahead.  Then it was time for the big day.

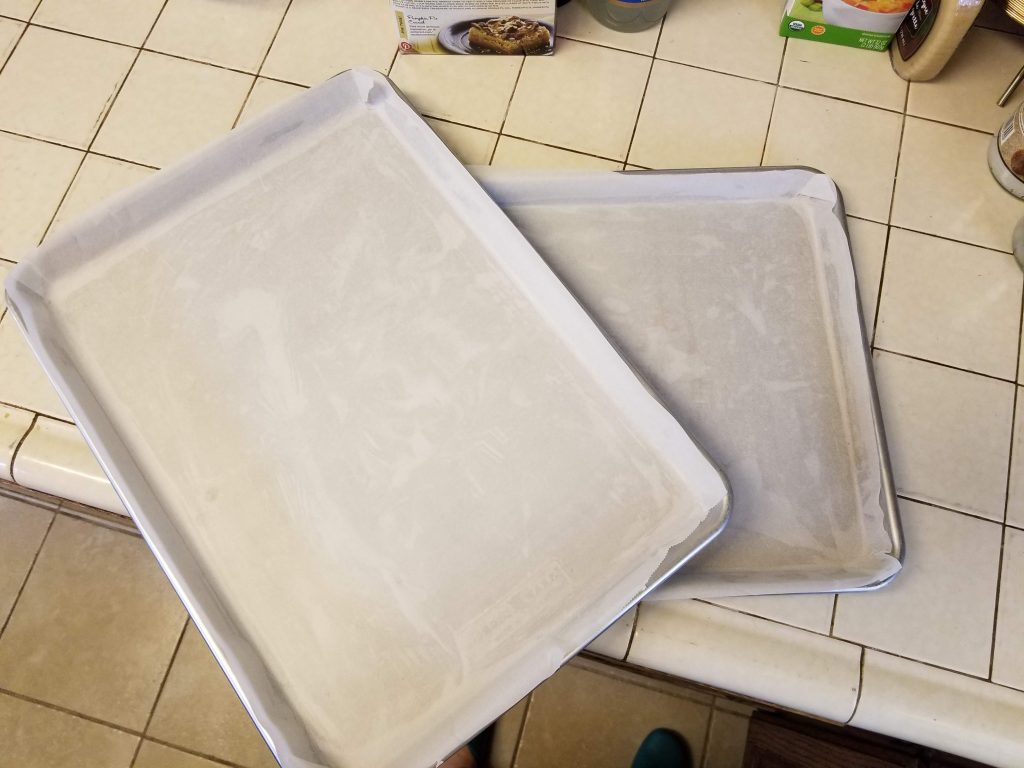
I needed three layers of cake.  In the video, she cut out the rounds from a thin sheet cake.  Ok, I can do that, I have half sheet pans.  I greased the pans then covered them with parchment paper.  One box of cake mix filled one pan (yes, I used box cake mix).  Bake for 20 minutes.  Perfect!  I was making a 9” cake (using the ring from my springform pan for the mold) so I had to make a box of cake (good thing they were two for $3).  I wound up with four rounds and contemplated making an extra layer.

Back to work.  Cooled cakes were cut into rounds.  The extra cake and trimmings went into the freezer, I’m sure that I’ll come up with something to do with it.

Now it was time to make magic happen:

  • The ring was placed on an appropriately sized platter
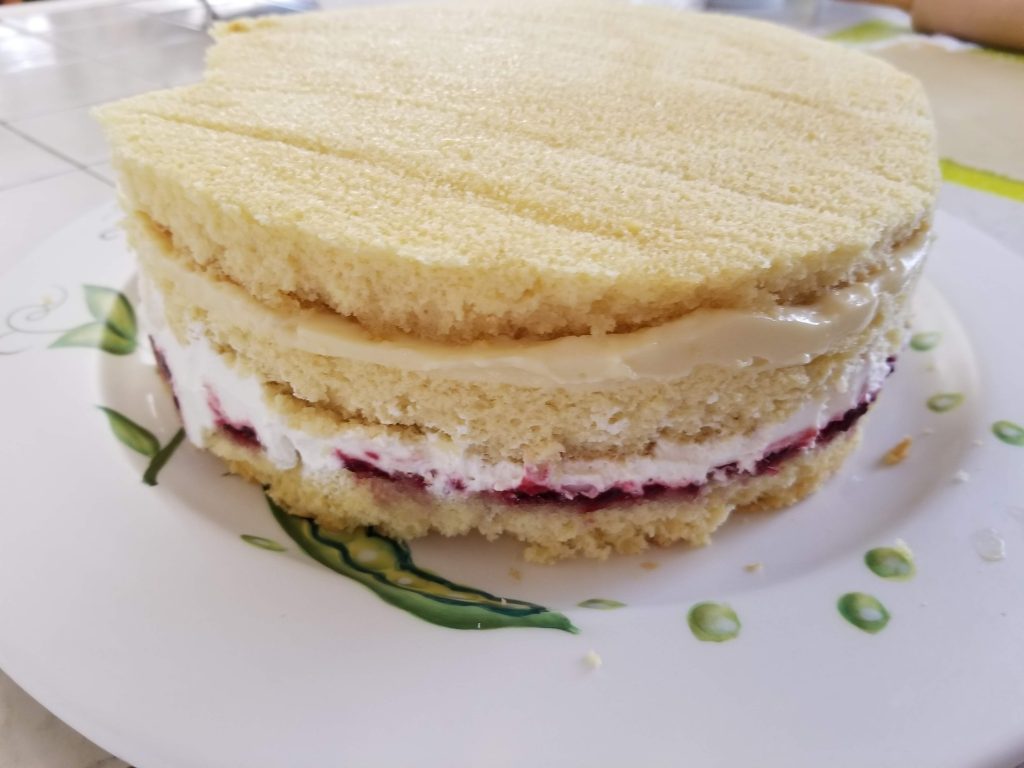
  • Round of cake
  • Brush with almond syrup
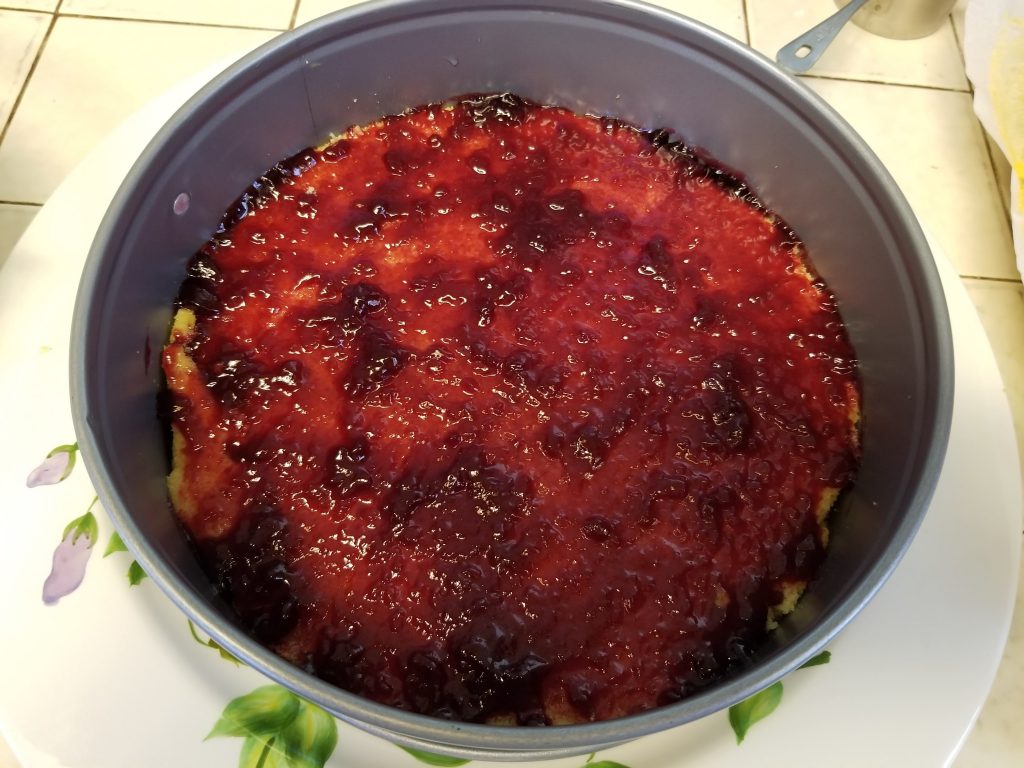
  • Cover with raspberry jam (I bought seedless)
  • Layer of whipped cream
  • Round of cake
  • Brush with almond syrup
  • Layer of pastry cream (I wound up with about a cup of pastry cream left over to do something wonderful with)
  • Round of cake
  • Brush with almond syrup
  • Cover and place in refrigerator to set

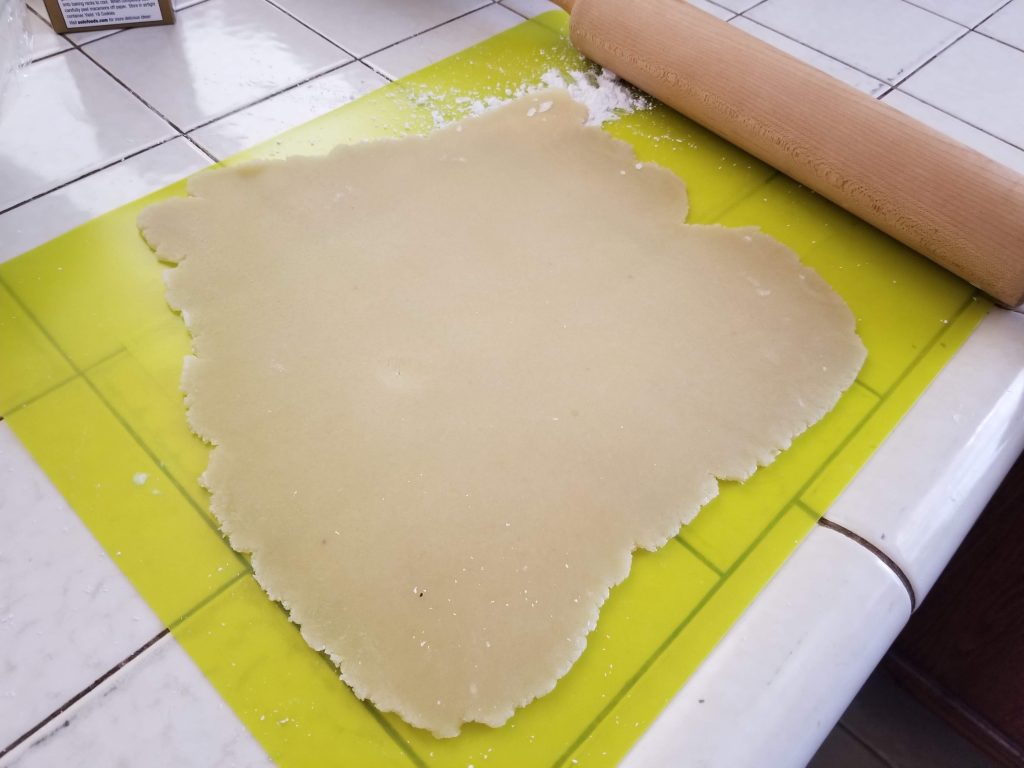
A bit later, I retrieved the cake, unmolded, and frosted the whole thing with whipped cream. Then back to the refrigerator to set while I rolled out the marzipan.

This is the part of our program where I made not one, but two unfortunate discoveries:

First, I didn’t actually have any food coloring hiding in the depths of my cupboard with which to dye my marzipan green.  Bummer, but not that tragic, beige can be elegant, right?  The second discovery was perhaps a bit tragic: one 8 oz. package of almond paste is not enough to cover an entire 9” cake.  So, she wound up with a little beige overlay rather than an elegant, pale green coat.

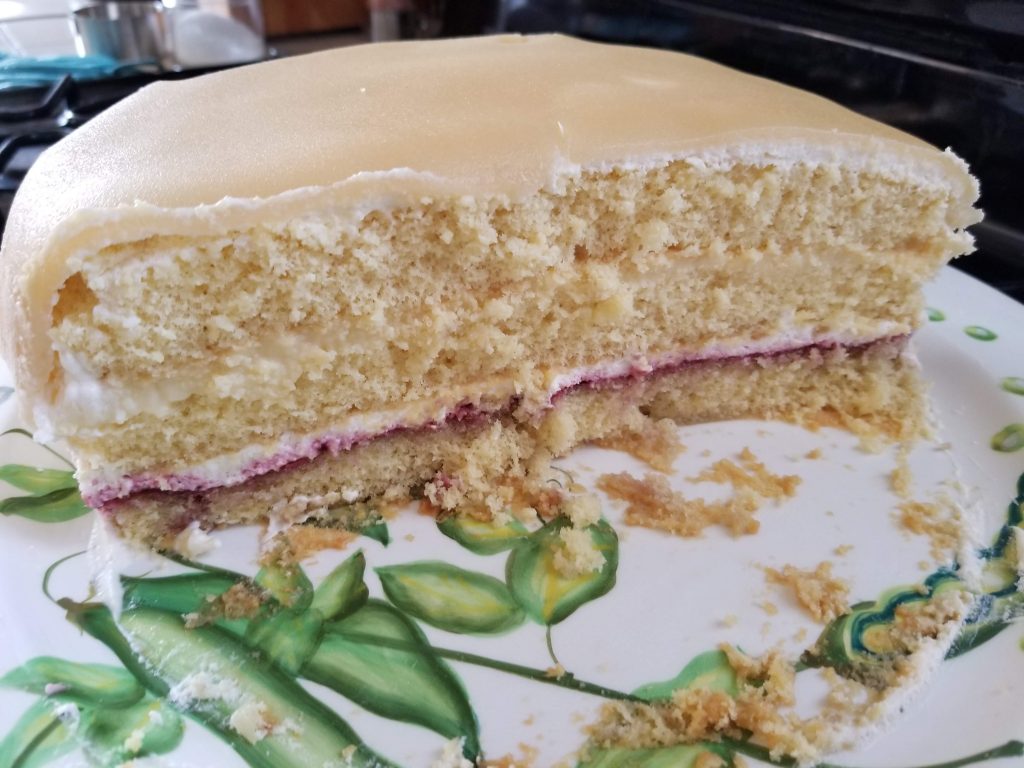
The good news is that she did turn out fluffy and creamy and delicious.  The better news is that the result was well worth the effort.  Princess cake will be attempted here again very soon, and I fully expect that she will be properly robed when that time comes.

That 70’s Closet

It turns out that my gym throws a big party every year.  This year’s anniversary party had a 1970’s theme.  I love me some disco!  So even though it required more effort than I usually put into getting ready for the gym, I was up for it.

There was a lot of scuttlebutt around the gym about what folks were going to wear for the party.  It was fun to hear about all of the outfits that people were searching for on the internet and at the local thrift stores.  I try to be a good sport when it comes to a theme party, but I’m not big on costumes.  I didn’t need to worry.  Somehow, my whole 1970’s-style outfit came from things that I already had in my closet.  I didn’t even need to dig very deep to be honest. 

Aside from the obvious – that I have not jumped on the Marie Kondo bandwagon yet – I’m wondering what that says about me?

There were a lot of options in my closet: actual 1970’s Gunne Sax prairie dresses, an assortment of Mrs. Roper caftans (I really love any opportunity for a caftan moment), a wrap dress of course, and an Altuzarra for Target dress that I had worn to a work function a few years ago.  The Altuzarra dress won.  There is something about shiny nylon, a deep V-neck, long sleeves, and a slit skirt that just seemed right.

Last summer, I did conduct a brutal edit on my shoe collection, but I still managed to have multiple appropriate options.  Gold, platform sandals were the winners.

Don’t forget the accessories.  I did go for a deep dive to pull out this great tooled leather handbag, but on my way there, I came across a green, snakeskin clutch who has been waiting for her moment of greatness.  A crocheted shawl just in case (any excuse to add fringe).  And my favorite Wendi Grant fringe-y earrings.  Perfect!

The greatest challenge I faced with my look was my hair.  Not what to do with it – big and feathered obviously.  But if I could make it happen.  Guys, I haven’t owned a curling iron in years.  I managed to create a decent Jaclyn Smith/Kelly Garrett look with my blow dryer and a round brush!  With a little help from my neighbor’s flat/curling iron, I had a disco-ready do.

My friend showed up wearing a fabulous, red, halter jumpsuit.  Thankfully, she also brought the blue eyeshadow and we were ready to hit the town!

Although I’m sure that it would be nice to have a streamlined closet, it is incredibly satisfying to know like I can go in there and emerge with something appropriate to wear for almost any occasion.  It isn’t that my closet is overflowing, there is just a nice, eclectic assortment of not-for-everyday pieces ready to be put into service at a moment’s notice.  That’s called being prepared, right?

Ore’ Originals

Happy Products for Good People and Pets

You know how I love my group exercise classes at the gym?  Well, one of the reasons is that I always meet such nice and interesting people there.  One really wonderful woman who I met in yoga class (she is also a fellow member of Rachel’s cycle groupies) is the owner and designer of her own gift-ware business called Ore’ Originals. They make happy products for good people and pets.

I love creative people, so when someone mentions that they are a designer, I always want to know more.  Lisa really did start this business in her garage.  Now she has this awesome facility with light-filled offices and her warehouse on site. 

Ore’ Originals world headquarters

Lisa has this beautiful energy, it’s like practicing yoga next to a sunny day.  I think that she infuses that energy into her products, I mean, I’ve never had such a happy feeling looking at baby teethers before.

She is always working on new ideas and making sure that her products are safe as well as attractive and useful.  When I visited her, she showed me some new products that they were just coming out with and some concepts that were still in development.  She also told me about how they send samples for testing to make sure that there aren’t any dangerous chemicals.

Ore’ Originals has three lines:

Sugarbooger

Sugarbooger is the kids line.  The core product line – sippy cups, divided plates, suction cup bowls, lunch boxes and accessories, etc. come in so many super adorable patterns that Lisa created.  Of course my favorites are “Go Kitty Go!” (because what is better than kitties and bicycles?) and “Flamingo.”

Ore’ Pet

Ore’ Pet is the pet line (surprise!).  I know Lisa as a fellow cat lady, but it seems that the pet line started when she had a pet dog (that’s ok, I won’t hold it against her).  Now, they carry almost as many cat products as dog products.

As a new baby kitten present, Lisa gave Anabel and Sally a set of these beautiful kitty dishes.  I had been feeding them out of tea saucers but Anabel would step, then sprawl onto her dish (she was a slob).  These precious little dishes solved the problem and helped her learn proper table manners.  I love the aqua with the pretty, orange rim.  I also love how the pattern on the dish is textured, it’s a lovely touch.

These “Wish You Were Here” toys are so beyond cute.  They would make really pretty Christmas tree ornaments, don’t you think?

Living Goods

Living Goods is the original line which encompasses all sorts of fun around-the-house-type things.  It’s the stuff for grown-ups and the products are all based on the idea of eclectic home organization. 

There are three styles of mugs: “Pop of Color”, “Cuppa This Cuppa That,” and “Cuppa Color.”  All the designs are really cute, I would hate to have to pick a favorite.  My neighbor had one of her mugs that he really loved, I would see him running out to catch his ride to work with his Ore’ coffee mug in hand.  He said that it had a “great mouth feel” as opposed to that coffee mug that I had once that would trick me into dribbling coffee down the front of my shirt pretty much every time I used it (I’m not kidding!  I thought it was me, but my drinking problem stopped when I switched mugs).

There are fun tabletop things like placemats and coasters.  And how brilliant are these chalkboard placecards?  I feel the sudden urge to plan a party.

Holiday Decorating

I’m a big fan of holiday decorating.  I love to spend the day after thanksgiving just holiday-ifying my whole house. There are garlands and vases full of ornaments.  The stockings are hung by the chimney with care.  There is a small collection of nutcrackers and a tree just for cat ornaments. There is a wire wreath just waiting for everyone’s Christmas cards.

And there is the flamingo tree, the best Christmas tree of all.  Oh, the flamingo tree is so beautiful, a white tinsel tree with only pink flamingo ornaments.  Last year I sewed a flamingo Christmas tree skirt for her, it’s reversible.  All the rest of my holiday décor is red and green, but the flamingo tree stands alone, a beautiful pink and white treasure.

A few years ago, my mom sent me a ladder for my birthday.  It is one of those great convertible ladders that goes from step-ladder mode to big-tall mode.  She was sick of listening to me complain about how hard it was to put up my Halloween and Christmas decorations and decided to provide me with the tool to solve my decorating woes.  And it worked!  Ever since I got that ladder, Mr. Man has put up the Christmas lights on our little bungalow every year.

Our neighbors next door on both sides and across the street go with the old-school, large, multi-colored bulbs.  We go with warm white icicle lights.  It’s a nice contrast.

The house on the corner

When Mr. Man put up our lights after Thanksgiving, it was a 75+ degree day.  We decided that it was nice that he put up the Christmas lights so that we would know that it was winter, otherwise, we might not have noticed.

Inside is another story. Because we have these two wonderful treasures living here named Anabel and Sally.  And I am very confident that anything that I put out would be interpreted to be new cat toys.  The fireplace is still filled with boxes so that they can’t get in there (they still are trying), I don’t even know what I think will happen if I try to hang the stockings.  I managed to sneak in my meager collection of nutcrackers and the Christmas card wreath but that is pretty much it.  This year my indoor holiday decorations are on a break.

Even though I miss my flamingo tree, I would be so sad to be cleaning up the aftermath of a kitten attack on it.  Fortunately, I have many photos from last year so that we can all enjoy it virtually.

As much as I like to have my holiday decorations up right away after Thanksgiving, I want everything packed up and put away before the new year.  So, the upside to this indoor decorating minimalism is that my New Year’s Eve cleaning binge is going to be much simpler this year.

I will be taking the next few weeks off and will be back on January 7th.  I will look forward to catching up with you in 2019!

Another Dinner Experiment

I was looking for recipes on Pinterest for something with sweet potatoes and zucchini.  I didn’t find quite what I wanted, but I did find enough to give me an idea of what I was going to attempt.  It was time for another dinner experiment.

Sweet Potato/Zucchini Concoction

  • Slice (thin-ish) sort-of equal amounts of sweet potato and zucchini
  • Layer in baking dish (cute, right?)
  • Drizzle with garlic butter (I used 4 tbsps of butter, 1 clove of garlic, and a dash of herbs de Provence)
  • Bake covered at 350 for 45 minutes (I would probably try 30 minutes at 400 next time)
  • Uncover, sprinkle with Parmesan cheese, bake for another 10 minutes

I did find a recipe for blackened something and I thought that the blackened spice mix sounded like I might like to try it on the salmon that I was making to go with the sweet potato/zucchini concoction.  Of course, I didn’t have all of the ingredients, so this is what I wound up throwing together (I did measure!).

Blackened seasoning:

  • 1tbsp smoked paprika
  • ½ tsp cumin
  • ½ tsp oregano
  • ½ tsp garlic powder
  • ½ tsp salt
  • ¼ tsp black pepper
  • Dash of cayenne

For the salmon, my goal was to make sure that it came out with crispy skin.  I found a great article on Epicurious about how to get crispy skin.  I had already prepped the filets and they were hanging out in the fridge waiting to meet their fate.

This seemed like another great occasion for my trusty cast iron skillet.  Unfortunately, I did not do a very good job of making sure that the skin was as dry as possible before cooking.  The fish came out delicious, it was a very easy and fast method of cooking, but I did not wind up with the crispy skin that I was dreaming about. I’m looking forward to getting another crack at it, I think that I have learned my lesson and that crispy salmon skin is in my future.

P.S. Today is my 50th post!  Thank you for reading!!!

Thanksgiving recap

A few years ago, Mr. Man and I started a “Thanksgiving for Two” tradition.  I was so busy working so much that it was a special treat to spend some time at home cooking.  I would make all the traditional sides: green bean casserole, scalloped potatoes, yams with marshmallows on top, dressing, either pumpkin or apple pie (or both) and then we would get just the turkey breast to roast.  We would have Pillsbury crescent rolls and that delicious cranberry relish from Trader Joes and a nice bottle of wine.  I would set the table with our wedding china and crystal…it was a whole thing.

Now that I’ve been home a lot more and cooking more regularly, spending two days doing all those things lost some of its appeal.

This year, we spent Thanksgiving with our very dear family friends.  They are my second family and it is always fun to get to hang out with them.  Between the cooking and the eating, the catching up and the “remember when”s it was a full evening.

These friends have a lovely hillside house with fantastic views of Los Angeles and Orange County.  It was a beautiful sunset and I spent some time on the deck watching the almost-full moon rising through the trees.

Once the moon was out, the coyotes got to work.  There were a few different packs down the hill a ways braying and howling.  Hopefully all of the neighbors had brought their kitties and little dogs inside.  At one point during the evening, Buddy, their big dog got out.  It certainly wouldn’t be a family get-together without some sort of drama now, would it?  I don’t know if he went out there to run the coyotes off, but it quieted down outside, and he came home before too long.


pretty table setting

Dinner was lovely.  The turkey was tender, there were yummy potatoes, two kinds of dressing, brussels sprouts, King’s Hawaiian rolls and of course plenty of good wine.  I made my “famous” spaghetti squash salad. It turned out yummy again which was a relief!

In addition to the usual suspects, a new friend joined us, and it was a treat to get to meet her.  She loves to bake (a good quality to look for in new friends) and brought the pie.  Not just pumpkin pie, it was pumpkin/sweet potato pie.  And it was divine.  She mentioned that in addition to all the meticulous effort she puts into preparing the pumpkin/sweet potato puree, she uses coconut cream instead of dairy cream for the custard.  Ah ha!  Remember when I told you that I thought that my coconut cream came out silkier than regular pastry cream?  It wasn’t just a fluke; other people do the same thing on purpose.  I love spontaneous positive reinforcement!

Almost looks too good to eat

How was your Thanksgiving?  Did you host?  What was your favorite dish?  Was there anything that you didn’t make that you wish you had?

Coconut Cream Pie

On my Instagram feed the other day, Martha Stewart posted a recipe for coconut cream pie as a great make-ahead Thanksgiving dessert option.  That made me think that this might be the right time for me to share my coconut cream pie recipe with you!

I had been obsessing about coconut cream pie a few months ago and after reading a bunch of different recipes on Pinterest, decided to take matters into my own hands. Now, I am no Martha Stewart, but this did turn out delicious and I’m looking forward to making it again very soon.

For the Filling:

Start with Martha Stewart’s No Fuss Pastry Cream.  BUT, make the following tweaks:

  • Replace 2 cups of whole milk with 1 ½ coconut milk (1 can) and ½ cup whole milk
  • Replace 2 tbsps butter with 2 tbsps coconut oil

This pastry cream recipe comes out extra silky with the coconut milk and coconut oil. I think that I might like the texture more than when I’ve made it with dairy.

After transferring cooked cream to a bowl:

  • Stir in 1 cup shredded, sweetened coconut
  • Cover with plastic wrap (press the plastic wrap onto the surface of the cream)
  • Refrigerate for at least 4 hours to overnight

For the crust:

  • 1 box of Trader Joes Cookie Thins in Toasted Coconut flavor
  • ½ cup granulated sugar
  • 6 tbsp butter
  • 6tbsp coconut oil


  • Crumble cookies in the food processor
  • Add sugar, pulse to distribute
  • Add the melted butter and coconut oil, pulse to combine
  • Dump into pie plate and use a measuring spoon to pack it down
  • Bake for 7 minutes at 375 degrees

Let cool completely

Assemble the pie:

Fill cooled crust with refrigerated cream filling.  Cover tightly with plastic wrap and put it back in the fridge.  Let it sit there for AT LEAST 24 hours (48 hours is even better).  Top with freshly whipped cream and toasted coconut slivers before serving.

bonus points if you serve it on flamingo-themed plates!
Just a note to let you know that I will be taking next week off from the blog but will be back on November 26!  Have a wonderful Thanksgiving holiday!!

Deconstructed Chicken Pot Pie

Who doesn’t like chicken pot pie?  I like it enough that I don’t mind making it from scratch.  But, I am not great at winding up with something with the perfect filling-to-crust ratio and at some point, there are just a few too many steps for my liking.  So, I decided to make a “deconstructed” chicken pot pie.  I would make the filling and then make biscuits separately.

I thought about looking for a recipe, but decided to wing it.  Two recipes that I have made before and like are Wolfgang Puck’s Chicken Pot Pie (https://wolfgangpuck.com/recipes/) and Ina Garten’s Seafood Gratin (https://www.foodnetwork.com/recipes/ina-garten/seafood-gratin-recipe-1953985).  I decided to riff off of both of them for the filling.  For the biscuits, it was mom’s classic biscuit recipe of course.

Here is what I came up with:

Chicken Pot Pie Filling:

  • 2 cups of leeks chopped (about one leek – I got the cleaned, packaged leeks at Trader Joes)
  • 2 cups chopped celery (since the leek was 2 cups, I based the rest of the veggies off of that)
  • 2 cups of chopped carrots
  • 2 chicken breasts, cubed
  • Oil (I used canola, olive oil would work too)
  • White wine (few splashes, maybe ¼ cup?)
  • 4 tbsp butter
  • ¼ cup flour
  • 2 cups milk (I used whole milk this time, you can also use part milk, part chicken broth)
  • Salt
  • Pepper
  • Herbs de Provence

In a skillet (I used cast iron) heat enough oil to coat the bottom of the pan over medium-ish heat.  Add the leeks, celery, and carrots.  Sauté vegetables until they reduce by approximately half (5 minutes-ish).  Add dash of salt.  Add splash of white wine, continue to cook for a few more minutes.  Once everything looks nicely softened, remove from pan (I just had a mixing bowl on the side to put things in to hang out).

Then throw the cubed chicken in the pan.  Season with salt, pepper, and a dash of herbs de Provence (if you want, I have a thing for thyme these days and like to use it whenever I think I can get away with it).  Once the chicken is cooked, remove from pan (I just stashed it in the same bowl with the veggies).

I had found a zucchini in the refrigerator, so I sliced it up and threw it in the pan to sauté for a few minutes too.  Mushrooms would be good too.  So, if you add any extra veggies, once they’re cooked, remove them to your storage bowl.

Then throw the butter in the pan.  Once it starts to melt, sprinkle in the flour and get your roux going.  This should pick up all the good bits that the sautéed veggies and chicken left in the pan.  Let the flour cook for a few minutes, then add the milk a bit at a time (I did not warm my milk first, which does make the roux seize up, but it will smooth out after it warms up, just keep stirring).  Add some salt and pepper to the sauce (it might have been fun to add some paprika or cayenne here…maybe next time).  Once the sauce is warm and starting to thicken, throw the chicken and veggies back in the pan.  Add fresh peas (1 cup?), stir to combine and let it sit there on low/medium low heat.

Now you can throw the biscuits together.

Mom’s Classic Biscuit Recipe

Preheat oven to 450.

  • 2 cups flour
  • 3 tsp baking powder
  • 1tsp salt
  • 6 tbsp shortening (I used unsalted butter this time)
  • 2/3 cup milk

Sift dry ingredients together.  Blend in butter or shortening.  Add milk.

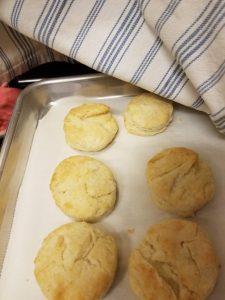
Once the dough comes together, turn it out on a floured surface.  Roll it out (I just mashed it out with my hand).  Use a biscuit cutter (or a glass) to cut the biscuits.  Place on baking sheet.  Bake for 10 minutes (they will be pale, but should be slightly golden on top).


I served the filling in a bowl with the biscuits on a plate on the side.  I had 2 tablespoons of butter from the stick that I used to make the biscuits with, so I whipped up a little batch of honey butter (yum!).

Overall, I think it came out really yummy.  I could have cooked the vegetables more, they were a little crisp, but I liked the fresh crunch with the creamy sauce.  It certainly is a lot more steps than sheet pan dinner, I don’t think that I would like to go through this much bother every week.

Shopping, Etcetera…

Disclaimer: this is not a paid endorsement

There is something to be said for a no-nonsense clothes shopping experience. I have become an almost exclusively online shopper because I just can’t be bothered to go to a store anymore.  That being said, there is something wonderful about shopping in-person, you get to discover different things, touch the fabrics, and notice the details of things that you would miss online (I recently ordered and then immediately returned a jacket that I was SURE had ¾ sleeves, it didn’t, the model just had really long arms – oops!).

The main things that I am completely over in terms of in-person shopping are 1) digging through racks to try to find your size in something; and 2) standing in line to make a purchase (really, you expect me to WAIT for the privilege of giving you my money?).  It turns out there is a better way…

My friend Liz McCann is one of the most down-to-earth, fancy ladies I know, and she has found a wonderful way to give busy women a convenient, efficient, and personal shopping experience.  Now, it helps if you have a big enough house to be able to turn your formal living and dining rooms into a showroom for a week or so four times a year…hey, I told you that she’s fancy.

shopping at Chez Liz

pretty scalloped piping on black slacks

Liz sells a clothing line called Etcetera.  To be honest, it is a little pricy.  But the clothes are nicely made, and every piece has some beautiful, surprising details.  Each season’s line is organized and coordinated to create various capsule wardrobe options (it is sort-of like Garanimals for grown-ups). When I shop with her, I am usually looking for just one or two pieces special pieces to give my wardrobe a pick-me-up and I always seem to find a treasure.


this embroidered coat would make leggings and a t-shirt acceptable anywhere

Shopping at Liz’s house is fun.  You get the whole showroom to yourself and can try everything if you wanted to.  Liz will get you to try things that you wouldn’t usually consider. And she will be honest when something just doesn’t work. Even though she has limited sizes in the samples, she knows how the line fits and has never steered me wrong when she’s advised me on what size to order (any of the times that she told me that I need a smaller size).


This is a trouser jean with racing stripes. The windbreaker has this pretty sleeve detail (it’s cuter on, trust me).

The clothes that I’ve bought from Liz are the pieces that I reach for when I needed to look professional, pulled together, and be comfortable.  I am also going on the record to admit that I have machine washed all sorts of things that I’ve gotten from her that said to dry clean and none of them came out any worse for it.


Liz currently has fall/winter in house until November 5.  If you are feeling the need to shop, shoot her a message at emccann1976@gmail.com and I’m sure she’ll fit you in.  You can also ask her to add you to her list and she will let you know when  she has the spring collection in house (February 2019 sometime).

The Green Monster

My friend had the day off work and we decided to take ourselves on an adventure.  We headed off to an estate sale that I had seen advertised on the internet.  I love estate sales probably a little too much and really try to avoid them because always wind up finding some treasure that I didn’t know I needed.  But this time, I was sure that I didn’t need anything, and we would find something for my friend’s redecorating project.  Sigh.

In one of the upstairs bedrooms were some very 1960’s hutches.  One caught my eye because it was fairly narrow.  I have this wall in the dining room that I would love to have a hutch of some sort on, but the wall is only 32” wide.  I asked my friend, “does this look like it’s under 30” wide to you?” Of course, she is the most prepared person ever and proceeded to pull a measuring tape out of her purse.  Yup, 30” exactly.  Oh man, should I get it?  $100 later, we had removed the top from the base and shoved both pieces into the back of my car.

top before
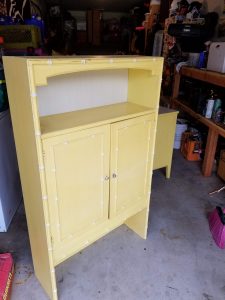
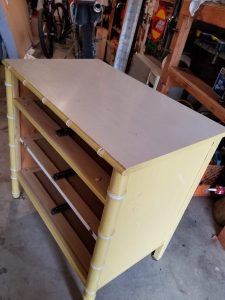
bottom being prepped to paint  

Mr. Man was NOT happy when I got home.  “Where is that going!?!”  I explained, first it is going into the garage, then after I paint it, it will go where that bookcase is in the dining room.  “And where is the bookcase going?” I will find it a new home, somewhere else, not in our house.  Hasn’t he learned to trust me by now?

My dream for this monstrosity was glossy, kelly green with gold accents.  Bright colors, shiny finishes, and Chinoiserie are not really part of my decorating scheme.  It’s not something that would necessarily go with anything else in our house.  But that is what it told me that it wanted to be.  A statement piece.

I decided to use spray paint because I figured it would be the easiest (if messiest) way to get the result that I wanted.  I am not a great spray painter. I wish I had gotten a more even finish, but I am still happy with the results.


hardware before

The hardware was brass painted white.  I was expecting to have to paint the hardware gold (and ultimately replace it), but after a little soaking in warm, soapy water and a little scrubbing  with a scotch brite pad, the white paint came off and I had exactly the look I wanted.

it fits!

I want to do something else with the backboard accent paper.  This gold leopard print didn’t quite do what I was looking for, but it’ll do for now.  Getting this guy painted and moved in the house was enough of an undertaking that I’m giving myself a little break before I dive back into finding the perfect pattern for the backboard.

I love having these drawers for placemats, napkins, tablecloths, trivets, etc.  There is plenty of space to keep lots of my entertaining things handy yet out of sight and that just makes me so happy.  I love the green color and the bamboo details.  Even though it totally doesn’t “go” with anything else in our house, it works in my crazy lady, eclectic mess decorating aesthetic.  Success!