Rosemary-Lemon Bread

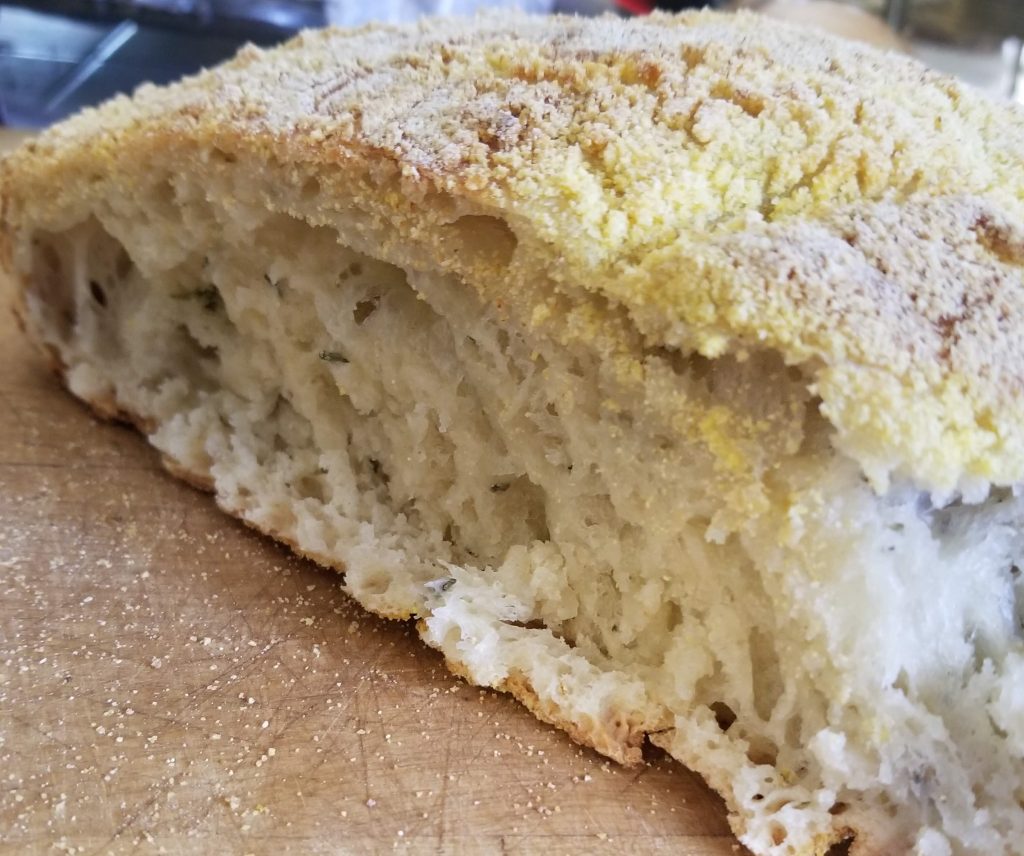
Among my various around the house activities these past few months, I couldn’t help to succumb to the siren call of trying to make homemade bread. It was a big deal; there were many (mostly imaginary) obstacles for me to overcome to attempt such a culinary adventure: my fear that it would be complicated, my disinterest in kneading, my lack of proper bread pans, and the absence of yeast in my pantry. Over zoom happy hour a while back, my friend mentioned that she had found a really easy recipe for rosemary-lemon bread that you make in a cast iron Dutch oven. I’m not sure what all she said after that, I only heard certain words which continue to ring in my mind: rosemary, lemon, crusty, soft inside.

I wiped away the drool and demanded that she send over the recipe immediately!

Now, what about the yeast? Mr. Man was planning on making a trip to the market, so I let him know that he had better come home with yeast because I needed to make this rosemary-lemon bread as soon as possible. I’m not saying that he didn’t wind up going to multiple stores on his quest, but he did return home triumphant.

Our first attempt was a moderate success. I think the dough wound up really sticky and that it didn’t achieve its full potential in terms of how much it rose. But it was tasty, and more importantly, the smell was incredible. It merited another attempt for that reason alone.

This past weekend I tried again. I was able to correct the two issues from my previous attempt and it came out even better than the first time around. I’m so excited to have made bread!

*If you are not already a bread maker, before you attempt this recipe, be warned: I feel that this is a gateway recipe that could create a lot of enthusiasm for and interest in making more/other kinds of bread (at least that is what has happened to me).

Williams-Sonoma Rosemary-Lemon No-Knead Bread

Ingredients:

  • 3 cups all-purpose flour
  • 1/4 tsp. instant yeast
  • 1 3/4 tsp. salt
  • 2 tsp. chopped fresh rosemary
  • 2 tsp. lemon zest
  • 1 5/8 cups water
  • Cornmeal as needed

Directions:

  • Combine flour, yeast, salt, rosemary, and lemon zest in a large bowl.
  • Add water, stir until blended (it will look like a mess, it’s ok).
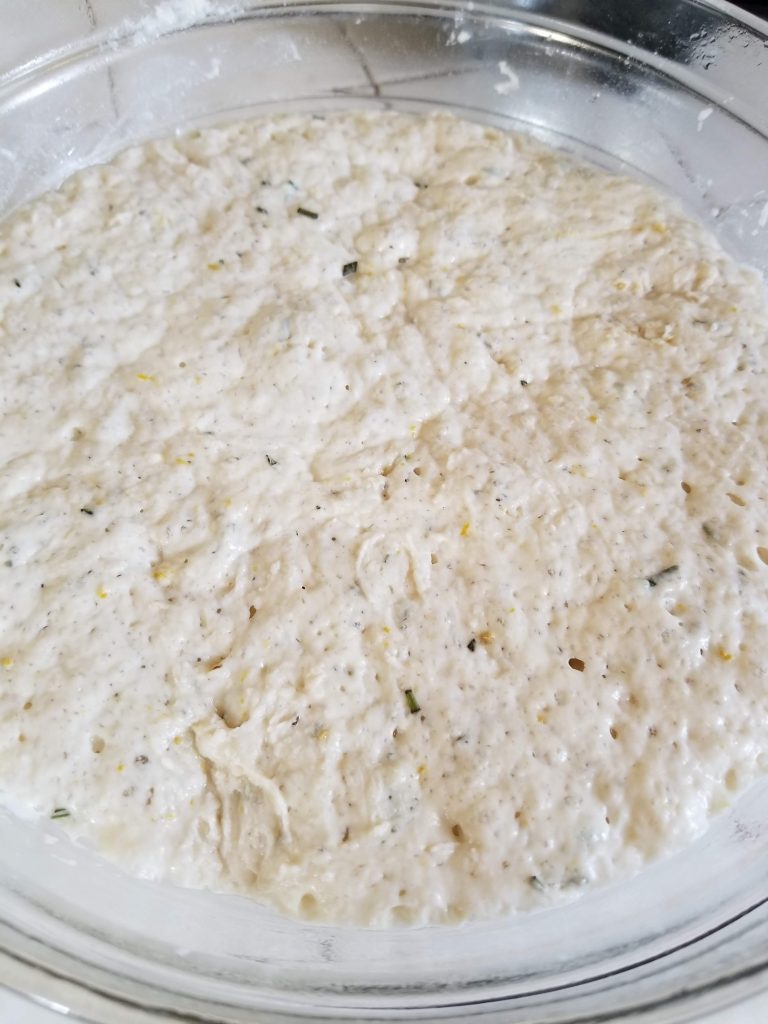
  • Cover with plastic wrap and rest in a warm (70-ish) place for 12-18 hours (I tucked mine into the oven with just the oven light on overnight).
  • After 12-18 hours your dough should have grown quite a bit and it should be bubbly/lumpy looking.
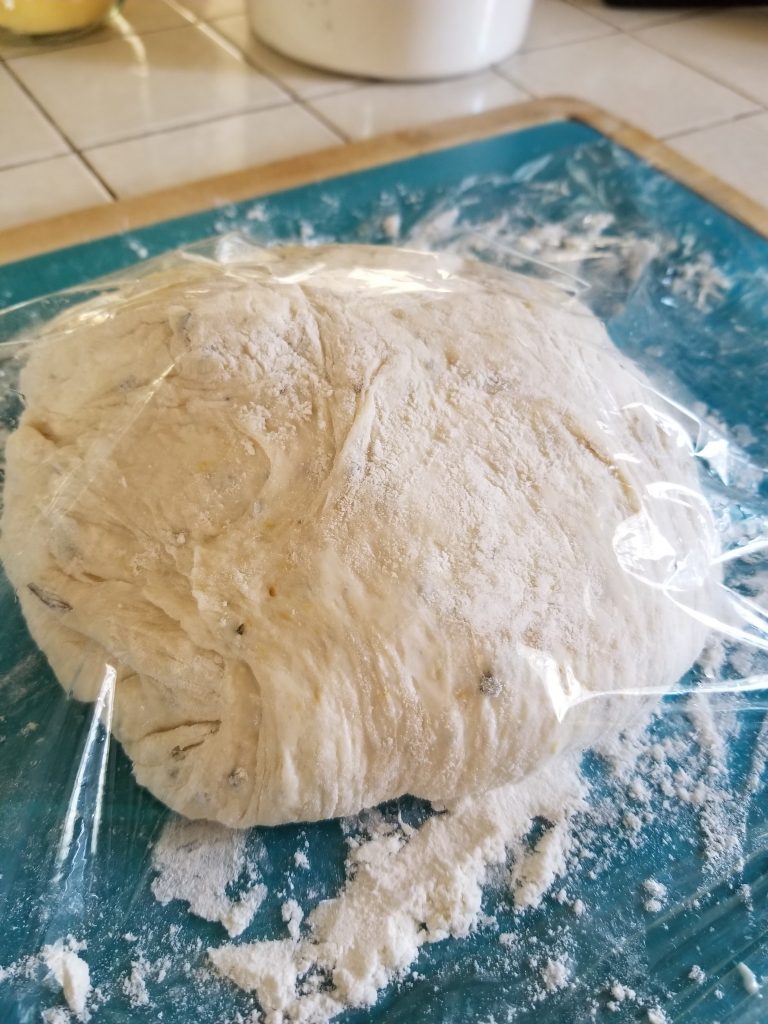
  • Dump the dough out onto a lightly floured work surface. Sprinkle with a little flour and fold it over itself a few times (it should be easy, when it stops wanting to fold, it’s ready to rest). Cover loosely with plastic wrap and let it rest for 15 minutes.
  • Get a tea towel ready with a light coating of cornmeal. Using just enough flour to keep it from sticking, form the dough into a ball. Place it on the cornmeal towel, seam side down. Dust with more flour and cornmeal and cover with another tea towel. (My dough ball quickly turns itself into a dough blob. It’s the thought that counts, right?)
  • Let rest for 2 hours (dough should double in size and should not spring back when poked).
  • At the 1.5-hour mark of your dough ball rest, put your Dutch oven (including lid) in your oven and preheat to 450. You want your pot to preheat for at least 30 minutes.
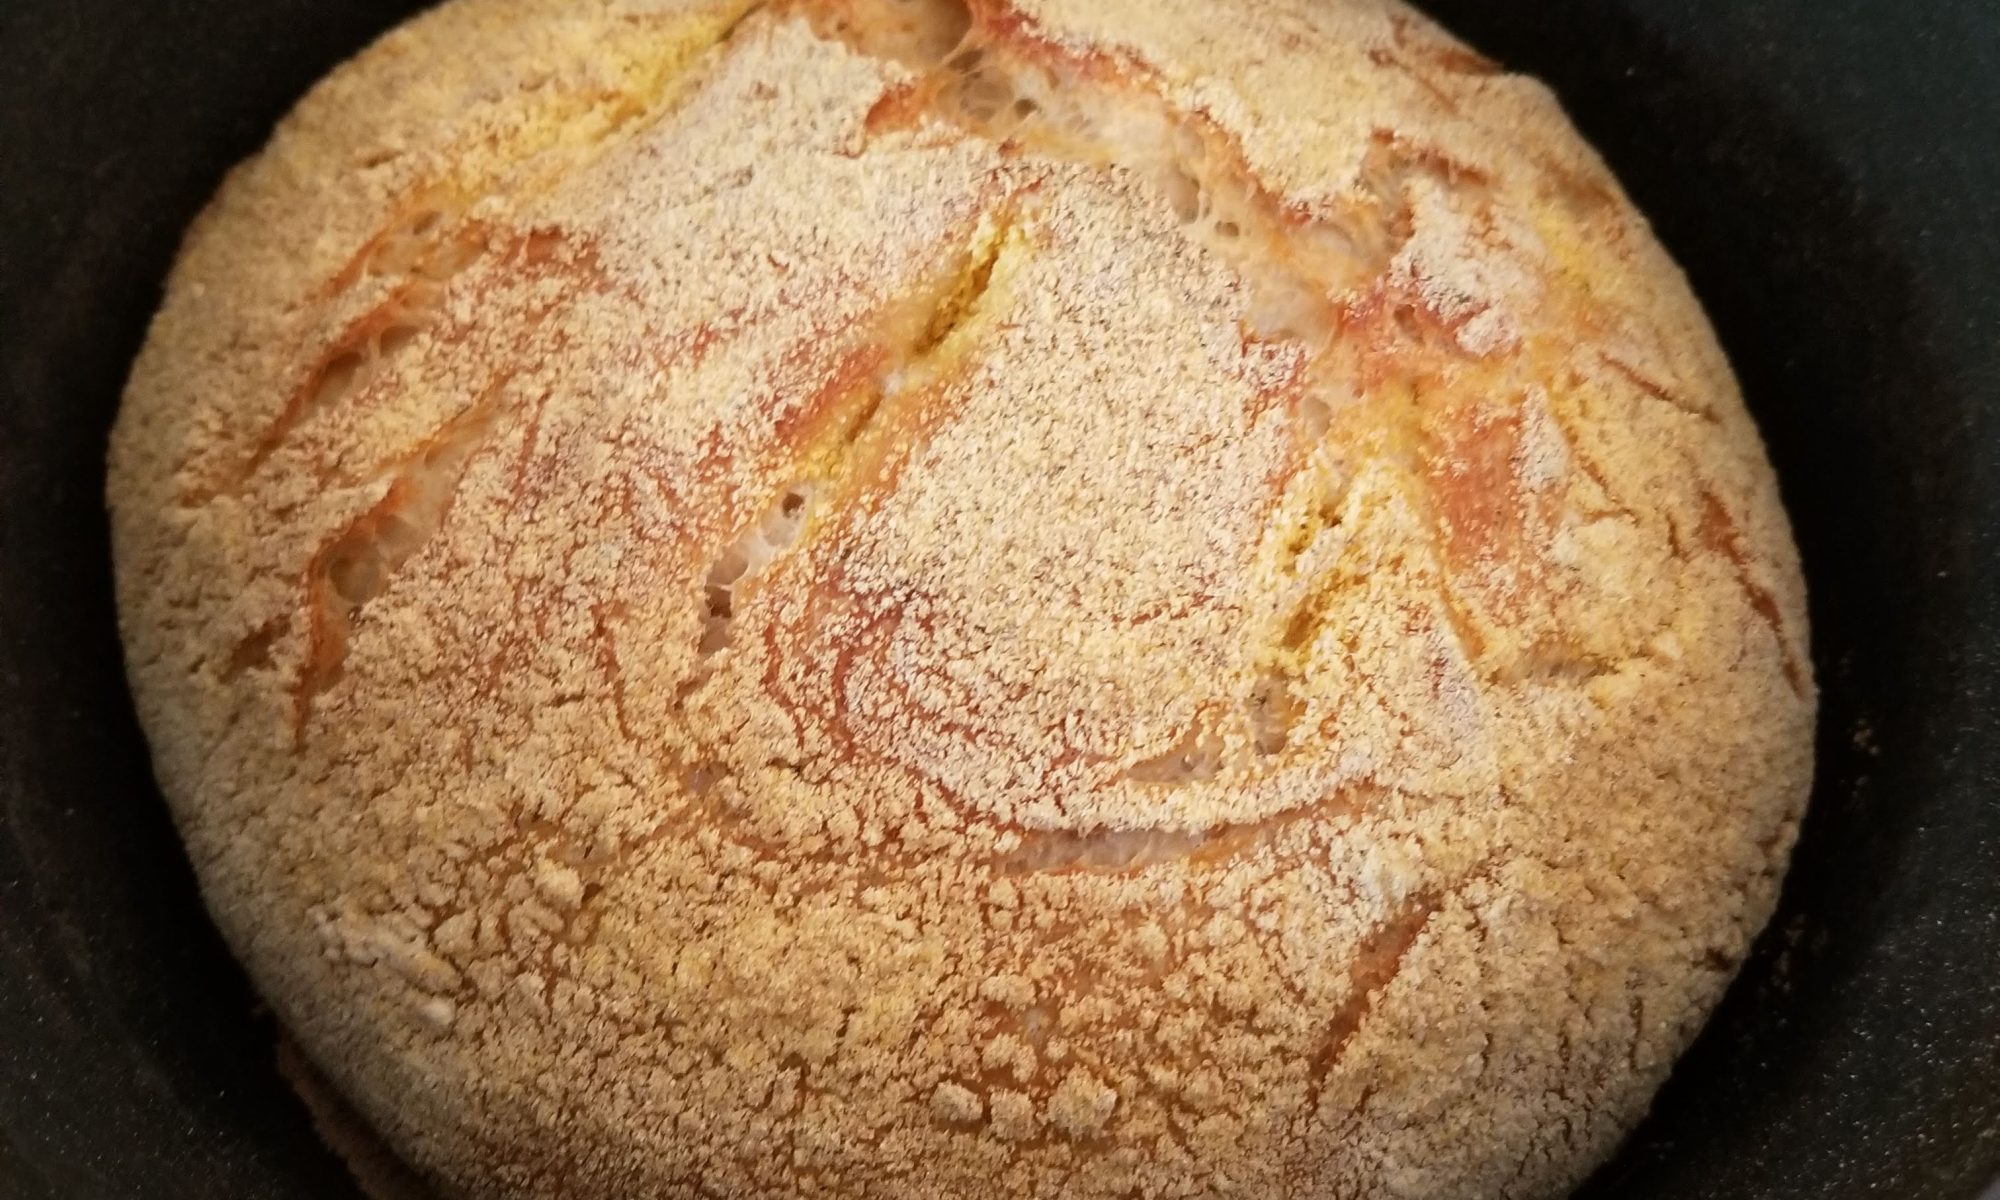
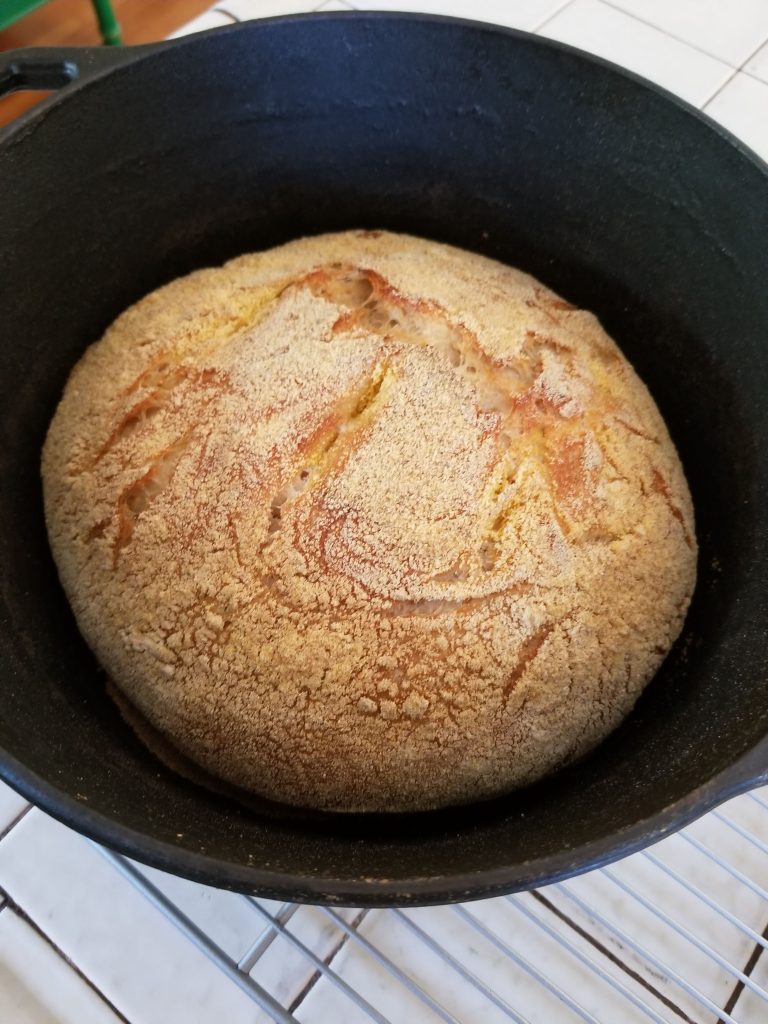
  • Remove the pot from the oven. Uncover the dough and use the bottom towel to pick it up. Carefully dump it in the pot (I got cornmeal EVERYWHERE, just sayin’). You can shake the pot a little if it looks too wonky. You also can use a knife to cut some slits in the top of the dough (it feels like a very professional-baker kind-of thing to do). Put the lid on and bake for 30 minutes. Uncover and continue to bake for 15-30 minutes (until the top is golden brown).
  • Remove from the oven and let it cool in the pot for 10 minutes before turning it out (I like to dump it out on a clean tea towel, otherwise I get cornmeal everywhere all over again).

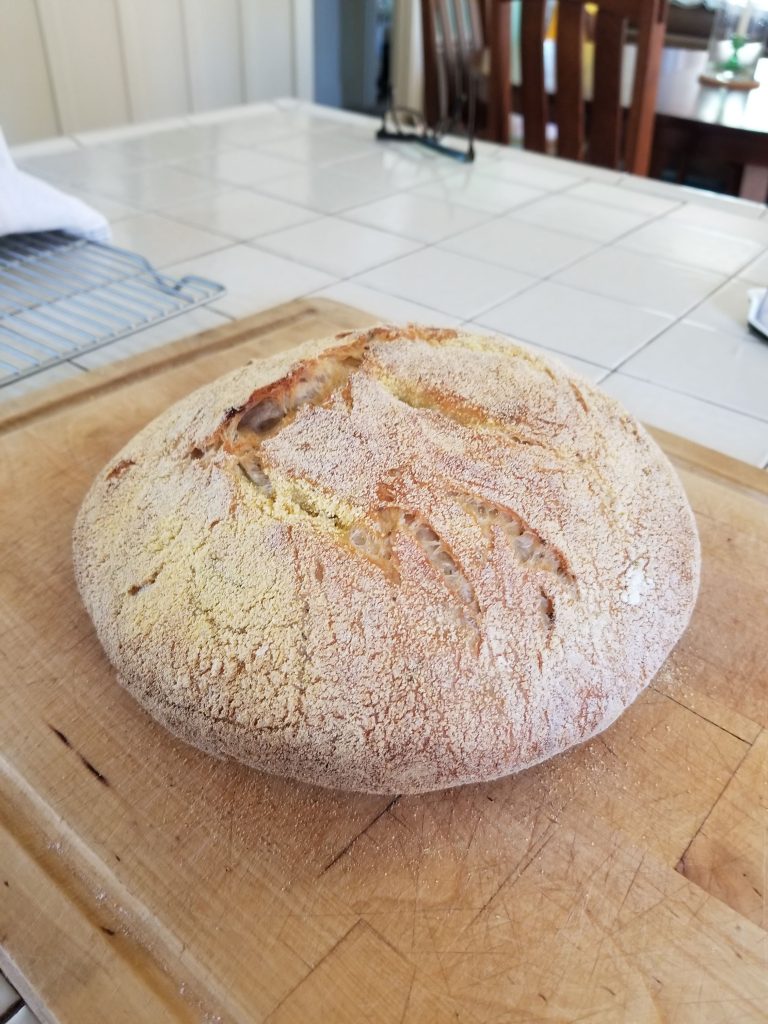
I recommend having softened butter handy and digging in while it’s still warm.  If you want to keep yourself from eating the whole thing, cut it in half right away and run some over to your neighbor.

Around the House

What have you been up to around the house?

We have all been at home for a long time now. Have you been doing quarantine-inspired stuff around the house? You know what I’m talking about:

  • Make banana bread (check)
  • Make bread (check)
  • Make that fluffy coffee (I haven’t tried this yet; I worry that it might be too delicious and take over my life)
  • Clean your closets (at this point, I only need the clothes in my sweatpants drawer, but I might regret getting rid of everything else, so I’m holding off)
  • Take an online class (check)
  • Crafts (check) *more about this later
  • Gardening (check)
  • Marie Kondo your whole house and garage (Ay caramba! No way!)

The list of possibilities is endless really. I’m sure that I’ve missed some good ones.

I haven’t done anything major, but I have done a few little things here and there that have really made a big difference in how I feel about my home. For me, when I finally break down and do something that I’ve been avoiding, I know that it was worth it because I feel taller when I’m finished.  I know, it’s a little strange, but there is no other way to describe it.

For me, sticking to little, bite-sized projects is key. When I think of a big project that I’ve been wanting to magically take care of itself (like reorganizing the kitchen), I get a feeling of dread that quickly leads to anxiety and avoidance. So, I have been thinking about my kitchen reorg as a bunch of small projects. Sometimes I do one a week … or less, but it’s not so overwhelming. In that spirit, reorganizing the kitchen became:

  • Clean the refrigerator (like where you take the shelves out and wash everything)
  • Move the coffee maker
  • Find a place to store the ice cream maker (even though we use it a lot, it doesn’t need to live on the counter)
  • Clean the cupboard under the sink
  • Find a new home for that silver tray that has been living on the counter for the past XX years
  • A bunch of other stuff that I haven’t started thinking about yet

Even cleaning the refrigerator was tackled one shelf at a time. It doesn’t matter that I did it slowly, I still felt taller when I was finished.

I’ve also made some progress with consolidating/organizing/purging some of my other clutter catchers. Sometimes, just moving whatever doesn’t belong out of a particular location is enough to jump start some sort of resolution to the issue, like when I collected the various piles of books from the various locations around the house into one, big pile in the middle of the living room. I may have had to stare at it for a week, but one day, motivation took over and I organized the whole mess (including re-homing many).

book stack
some of the books that were re-homed

Anyway, I was feeling relatively productive and accomplished about staying home until I saw this story about an artist who is painting flowers ALL OVER her home. It is so whimsical and happy. I mean, look at those doors!

I don’t think that I’m going to start painting flowers everywhere, but I do think that I will keep trying to find little ways to make the most of my home. How about you?  Have you tackled any around-the-house projects?  Did you feel taller when you finished or is that just me?

Kitchen Adventures – Cat Cookie Edition

My friend, S, gave me a set of cat-shaped cookie cutters for Christmas.  When giving them to me, she mentioned that she had seen something on Instagram about tie-dyed cookie decorating and thought that we could make tie-dyed cat cookies.

Well, you can’t just hang a statement like that out there.  I made her pick a date and commit to coming over for cat cookie making.

Now, I’m going to let you in on a little secret: I am not much of a cookie decorating kind of gal. I’m okay with the baking part, but I just don’t have whatever it is that you need to rock at cookie decorating (I’m pretty sure that whatever is a bunch of special equipment). However, I am also good at not letting being bad at something ruin my fun. So, I was not about to let an opportunity to play cat cookie bakers with my friend pass me by.

I made the cookie dough the day before. It never hurts to have well-rested overnight in the refrigerator cookie dough to work with.

I love Nigella Lawson’s Butter Cut-Out Cookies recipe from the How to be a Domestic Goddess cookbook. Whatever they wind up looking like, the cookies are just sweet-enough, just buttery-enough, just dry-enough, and a little salty. I like to substitute almond extract for the vanilla, but other than that, I wouldn’t change a thing.

I waited for S to come over to start baking because I find that whole rolling out dough, cookie cutter, transfer to the baking sheet business to be very tedious.  I was so glad that I did because it was almost fun since I had another person there to talk to.

Once we managed to get all the cookies baked, we threw that round of dishes in the sink and rested up with some snacks while the cookies cooled.  Once we were sufficiently snacked and rested, it was time for adventures in tie-dye cookie icing.

We made up a big bowlful of icing (aka wet powdered sugar) and then divided it into bowls.  S was in charge of the food coloring and she did a great job.  We had tangerine sunset, teal, and raspberry sherbet, to play with.

According to the YouTube video she had watched, you start with a base of white icing, drizzle the colors on top, rake through it with a toothpick, then plop the cookie, twisting as you lift.

Our results were somewhat lackluster.

We experimented with all sorts of things. It was all a mess. Finally, we decided to go for the drizzle technique.  First everyone on the tray got a white icing base coat. Then S drizzled tangerine sunset in one direction to make stripes.  I followed up with raspberry sherbet in another direction.  We decided to leave well-enough alone and not use the teal.

The end result was sort of a pseudo-preppy, abstract madras. More importantly we were done. Most importantly we came away with a newfound appreciation for those $7 sugar cookies you see in the bakery and without any delusions of wanting to go into the cookie decorating business.

No-Bake Cookie Adventures

When I was visiting my friend in Arizona we wound up in Flagstaff for lunch.  The place that we went had a big assortment of yummy, vegan sweets and K stocked up.  Her favorite of the assortment was a no-bake, vegan, peanut butter cookie.  She found a recipe online for a three-ingredient version that we decided that we had to try out.

Three Ingredient, No-Bake, Vegan Cookies

  • 1 cup creamy peanut butter (recipe calls for natural, unsalted)
  • ½ cup maple syrup
  • 2 cups rolled oats

Combine the peanut butter and maple syrup in a bowl.  Microwave in 20 second increments, whisk in-between until it is well combined.  Continue to microwave in 20 second increments until the mixture begins to dry out (4-7 times). Add the oats, form into cookies, freeze to harden.

For an added peanut butter cookie touch, we used a fork to flatten the cookies (cute right?).

I love how simple these cookies were to make.  I love that you didn’t even need the stove, you just use the microwave to do your “cooking.”  They were pretty yummy, but I do think the “dough” tasted better when it was warm.  If you are vegan and you are looking for something for your sweet tooth, this might be a good option for you.

I was interested to know what other no-bake vegan cookie recipes might entail, so I did a little googling and found this!

Peanut Butter-Chocolate No Bake Cookies

This is a chocolate/peanut butter cookie (click header for link).  It has coco powder, so you still get the gluten free thing, but you get a little bit of the body that you would get from a cookie that has flour in it.  You also use a little bit of coconut oil and some solid chocolate, which both add a bit of fat and I would think create a creamier texture.

I found about four variations on this same recipe, some used sugar instead of maple syrup, and one used coconut milk instead of almond (or other non-dairy milk).  I can see myself trying this out in some form.

No-Bake, Not-Vegan Cookies?

So, then I started to wonder (as one would) what a non-vegan no-bake cookie would entail.  Spoilers:  the recipes that I found were pretty much the same as the vegan cookies but included some form of milk and/or butter.  So whatever kind of milk you decide to use (or skip) and whatever kind of fat would be the variables between a vegan and a non-vegan cookie.  But all the no-bake cookie recipes that I looked at omitted eggs and flour (no surprise there!).

Since it’s starting to warm up, this may be a fun area of sweets-making to explore without having to turn on the oven (when it isn’t an ice cream experiment day at least).

Has anyone else tried any no-bake vegan baking?  Do you have a favorite recipe or trick?

Princess Cake

I generally like most kinds of cake but to tell you the truth, the one kind of cake that I love above all others is princess cake.  Even though her name is “Princess” she is the queen of cake in my world.

If you don’t know what princess cake is, it is a wonderful creation that begins with white cake soaked with almond syrup. One layer is filled with raspberry jam and whipped cream and the other layer is filled with pastry cream.  Then the entire delight is frosted with whipped cream and covered with a beautiful, pale green layer of marzipan.

Your mouth is watering, I can tell.

The other day, while mindlessly scrolling the ‘gram, I came across a Martha Stewart Living video of someone making Scandinavian princess cake.  Somehow, this video gave me the idea that I could actually make a princess cake myself.  Ok, not somehow, it was because all of the ingredients were already prepared – the cake was baked, the pastry cream and the whipped cream were chilled, etc. 

I overcame my fear of making pastry cream (Martha Stewart has a great recipe for “no fuss pastry cream” that I shared with you when I made coconut cream pie) during last year’s cream puff obsession. Since I had no intention to make raspberry jam, almond syrup, or marzipan myself, I felt confident that I had at least a moderate possibility of success.

I assembled my ingredients and made the pastry cream a day ahead.  Then it was time for the big day.

I needed three layers of cake.  In the video, she cut out the rounds from a thin sheet cake.  Ok, I can do that, I have half sheet pans.  I greased the pans then covered them with parchment paper.  One box of cake mix filled one pan (yes, I used box cake mix).  Bake for 20 minutes.  Perfect!  I was making a 9” cake (using the ring from my springform pan for the mold) so I had to make a box of cake (good thing they were two for $3).  I wound up with four rounds and contemplated making an extra layer.

Back to work.  Cooled cakes were cut into rounds.  The extra cake and trimmings went into the freezer, I’m sure that I’ll come up with something to do with it.

Now it was time to make magic happen:

  • The ring was placed on an appropriately sized platter
  • Round of cake
  • Brush with almond syrup
  • Cover with raspberry jam (I bought seedless)
  • Layer of whipped cream
  • Round of cake
  • Brush with almond syrup
  • Layer of pastry cream (I wound up with about a cup of pastry cream left over to do something wonderful with)
  • Round of cake
  • Brush with almond syrup
  • Cover and place in refrigerator to set

A bit later, I retrieved the cake, unmolded, and frosted the whole thing with whipped cream. Then back to the refrigerator to set while I rolled out the marzipan.

This is the part of our program where I made not one, but two unfortunate discoveries:

First, I didn’t actually have any food coloring hiding in the depths of my cupboard with which to dye my marzipan green.  Bummer, but not that tragic, beige can be elegant, right?  The second discovery was perhaps a bit tragic: one 8 oz. package of almond paste is not enough to cover an entire 9” cake.  So, she wound up with a little beige overlay rather than an elegant, pale green coat.

The good news is that she did turn out fluffy and creamy and delicious.  The better news is that the result was well worth the effort.  Princess cake will be attempted here again very soon, and I fully expect that she will be properly robed when that time comes.